Unity and touch controls
Welcome to a short Pixelnest’s tutorial. We will make a simple “game” where touching the screen will trigger some particles.
(Click to see the animation)
You can download the full project on GitHub.
This is an advanced chapter. If you are new to Unity, we recommend you to follow our beginner’s tutorial first.
Warning: this tutorial has not been updated to Unity 5.
Disclaimer
We will cover the basics of touch controls on mobile devices.
Developing for a mobile platform requires you to have an appropriate device and the full SDK installed on your computer.
No wonder: deploying on iOS require you to have a Mac with Xcode.
Same for Android and Windows Phone: you need to have a working copy of the SDK.
If you are really new to mobile development, follow the official developer documentation and make an “Hello World” app to ensure that the SDK is properly working.
Here are the official places to find those resources:
Testing environments
Mobile deployment with Unity can be quite fastidious. It takes up to several minutes to fully deploy a project on a device.
This is because you cannot test directly on the device. You have to build, open the Xcode project (for iOS), compile then deploy.
iOS and Android
For iOS and Android, Unity comes with a small app: Unity Remote. It allows a device to connect to Unity via the local network.
Using the app, the touch screen becomes a usable interface with a degraded live preview of your computer.
This is the good way to debug touch controls, but you still need to fully deploy to really test the app on a device.
Note: the iOS app only works with a Mac.
Windows Phone
For Windows Phone there is no remote app but a closer integration with the Phone 8 SDK.
In the Windows Store Build Settings, select Phone 8.1 as the SDK value and check Unity C# projects.
This will allow you to build, deploy and debug directly from Visual Studio.
Setup
Let’s start! We will first define some prefabs and setup our project and then focus on the touch gestures.
Create a new 2D project. Then, follow the guide…
Explosion prefab
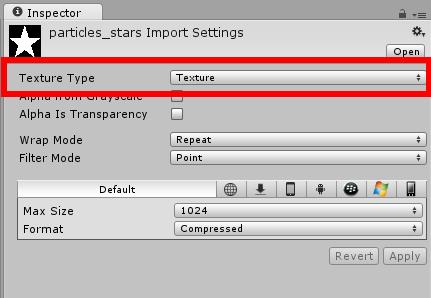
Import the following star texture (it’s white on blank, but it’s a star).
Set it as “Texture”.
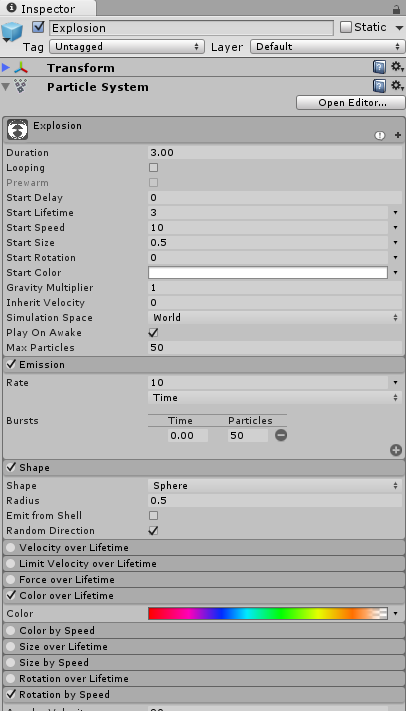
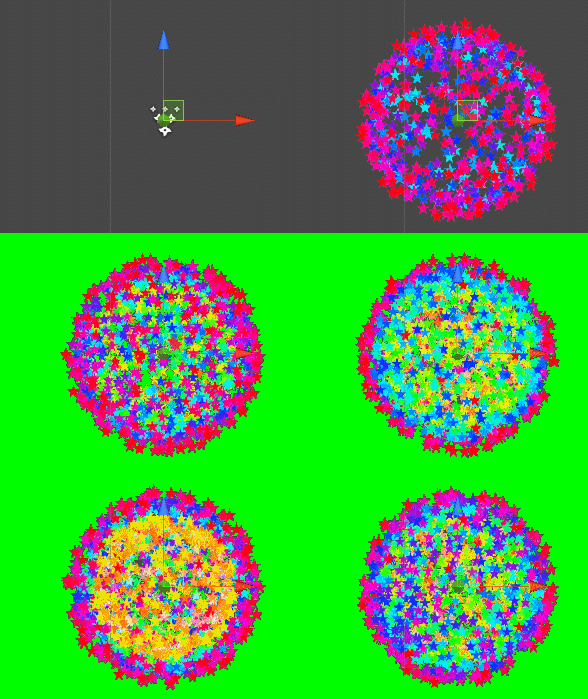
Create an explosion prefab. Here is an idea:
| Parameter | Value |
|---|---|
| Duration | 3.00 |
| Start Lifetime | 3.00 |
| Start Speed | 10 |
| Start Size | 0.5 |
| Simulation Space | World |
| Gravity Multiplier | 1 |
| Max Particles | 30 |
| Bursts | 0:00 -> 30 |
| Shape | Sphere |
| Radius | 0.5 |
| Random Direction | true |
| Color over Lifetime | rainbow gradient (see below) |
A rainbow gradient:
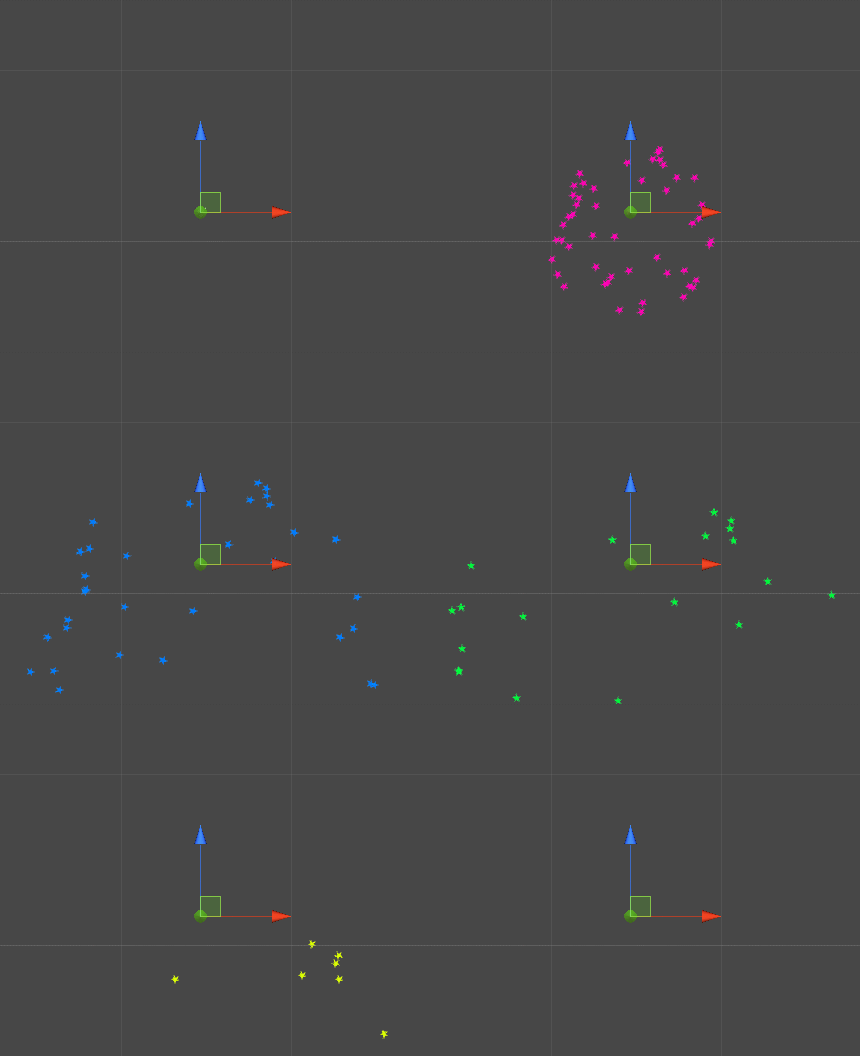
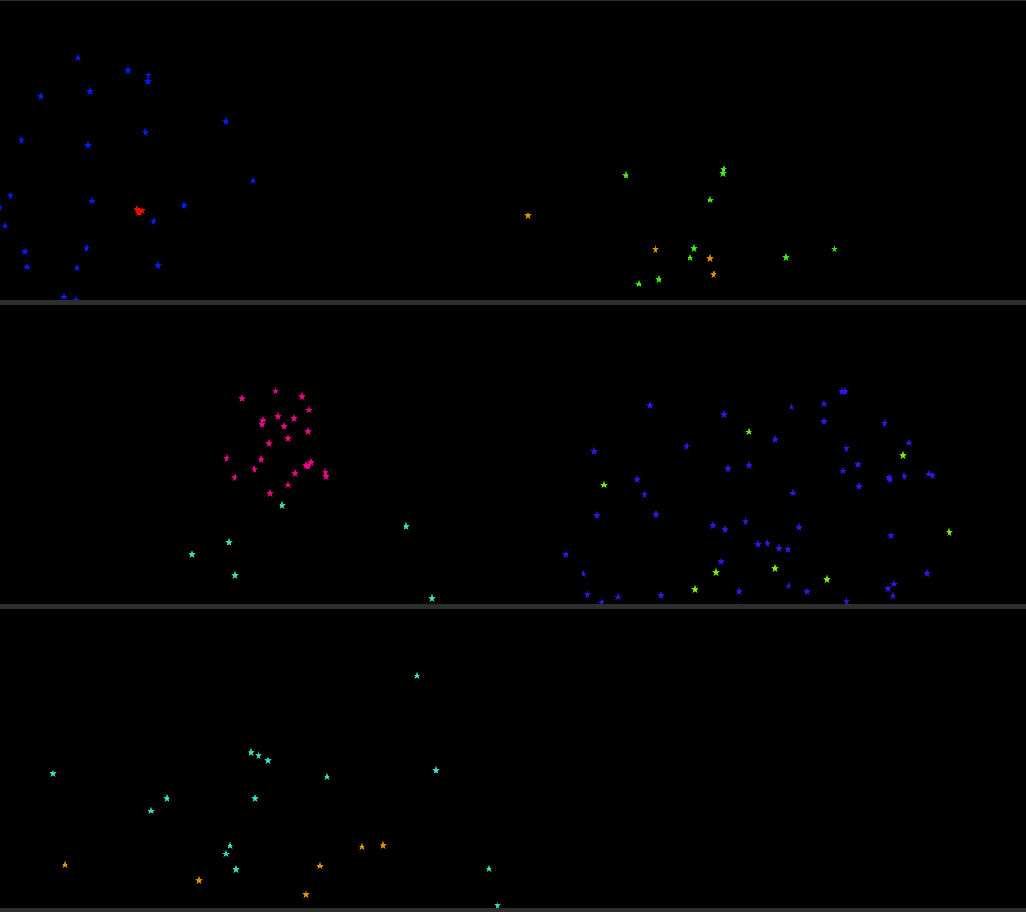
And the result:
You can tweak it as you like, it’s just a possibility.
Make sure to save it as a prefab.
Trail prefab
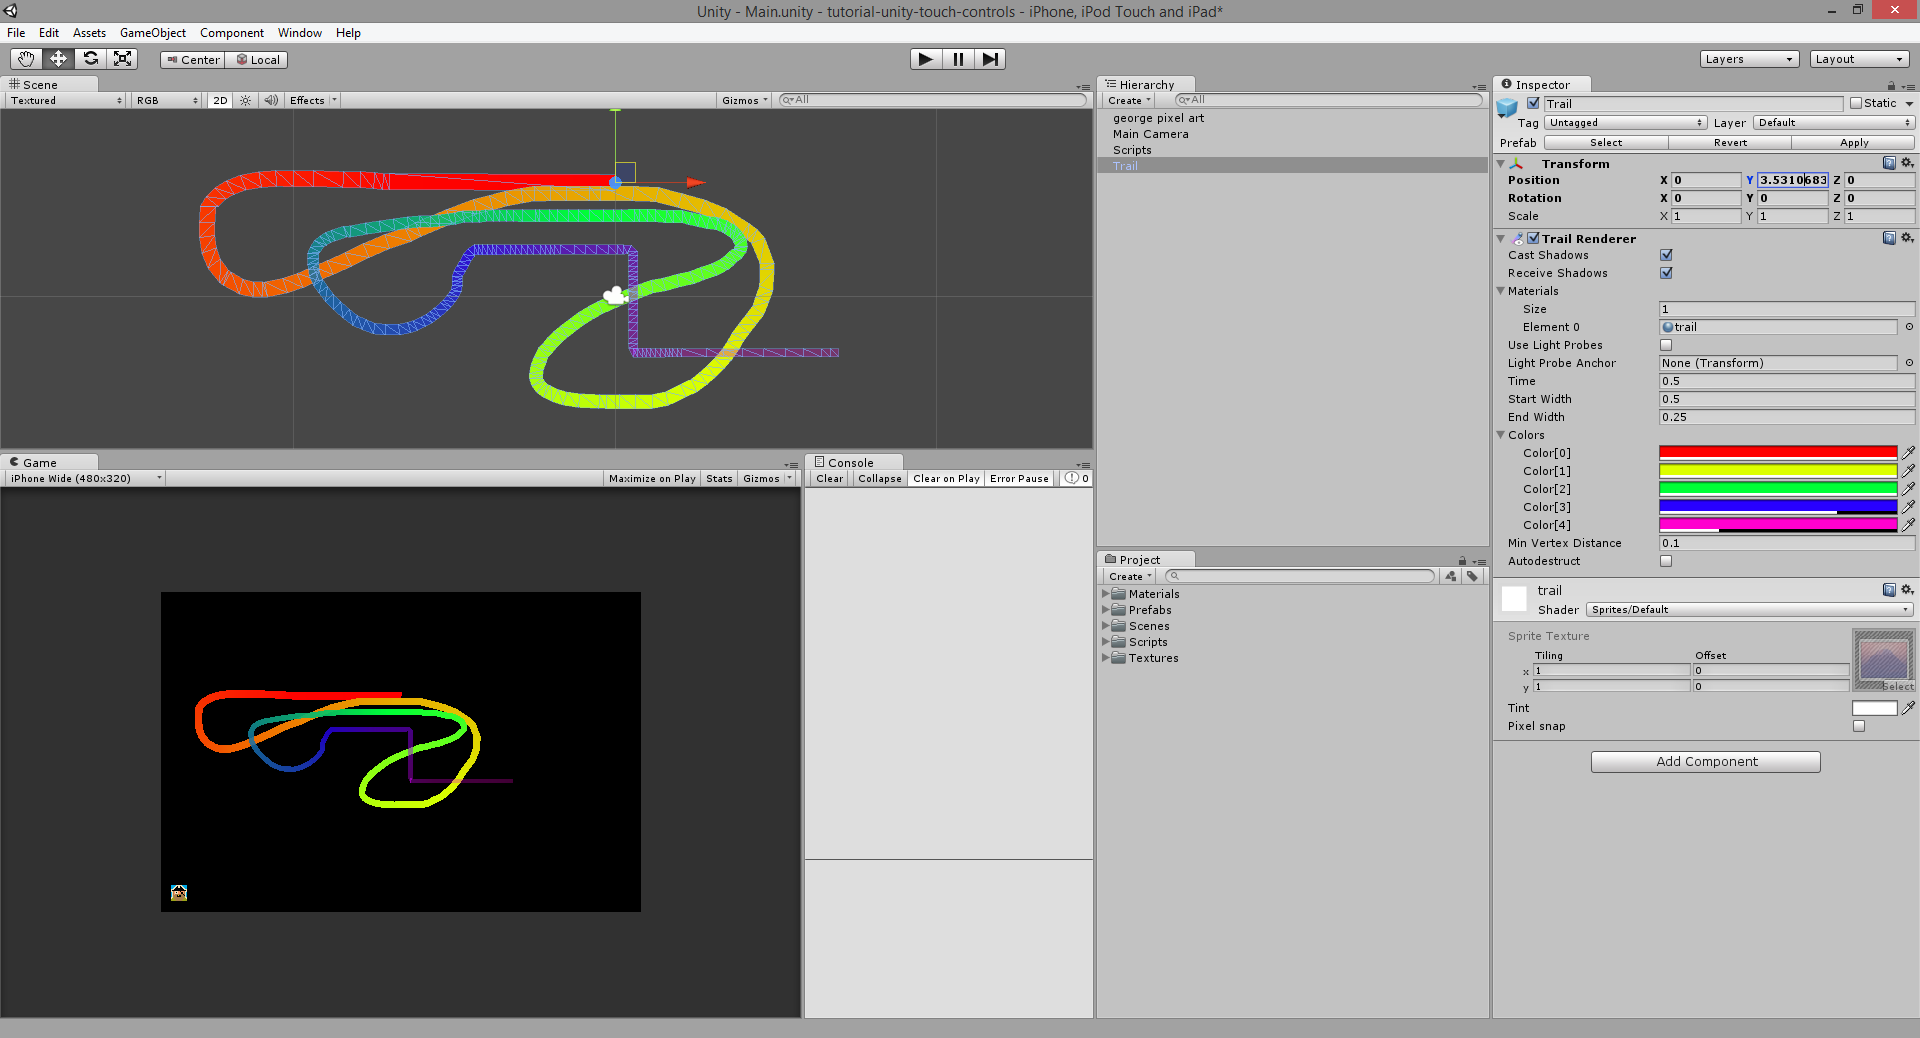
Create a new empty game object. Add a Trail Renderer component to it.
We will “rainbow” it too.
Create a new material with the Sprite/Default shader. Affect the material to the Trail Renderer.
Set some colors and tweak the size, like below:
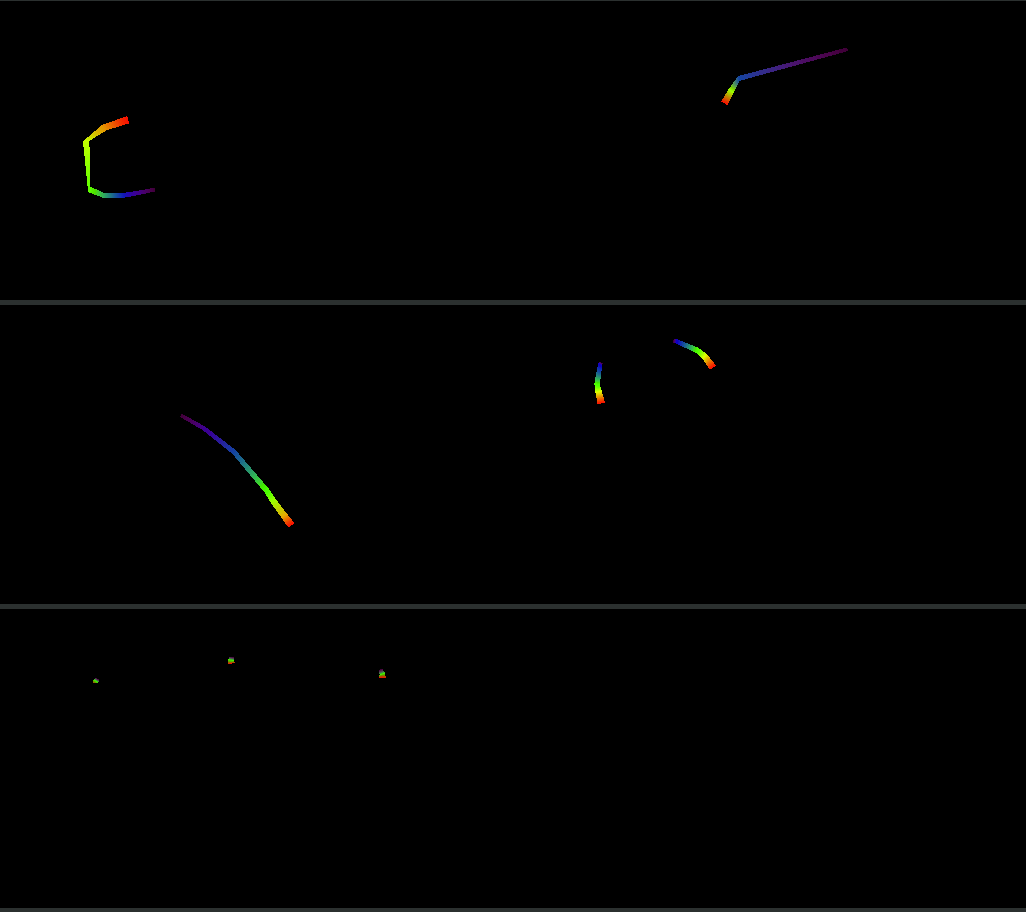
(Move the object in the scene to preview the trail.)
Make sure to save it as a prefab.
“Vortex” prefab
If you like particles, try to reproduce this one:
It’s just a very slow effect that loops endlessly. The particles are nearly not moving with a high spawn rate.
Camera
Change the camera background to black. Set the Size to 10.
Special effects helper script
This is a simple script that will handle everything related to the explosions and other effects creation.
Create a new SpecialEffectsScript and paste the code below:
using UnityEngine;

/// <summary>
/// Helper class to handle particles effects
/// </summary>
public class SpecialEffectsScript : MonoBehaviour
{
  private static SpecialEffectsScript instance;

  // Prefabs
  public ParticleSystem explosionEffect, vortexEffect;
  public GameObject trailPrefab;

  void Awake()
  {
    instance = this;
  }

  void Start()
  {
    // Check prefabs
    if (explosionEffect == null)
      Debug.LogError("Missing Explosion Effect!");
    if (vortexEffect == null)
      Debug.LogError("Missing Vortex Effect!");
    if (trailPrefab == null)
      Debug.LogError("Missing Trail Prefab!");
  }

  /// <summary>
  /// Create an explosion at the given position
  /// </summary>
  /// <param name="position"></param>
  public static ParticleSystem MakeExplosion(Vector3 position)
  {
    if (instance == null)
    {
      Debug.LogError("There is no SpecialEffectsScript in the scene!");
      return null;
    }

    ParticleSystem effect = Instantiate(instance.explosionEffect) as ParticleSystem;
    effect.transform.position = position;

    // Program destruction at the end of the effect
    Destroy(effect.gameObject, effect.duration);

    return effect;
  }

  /// <summary>
  /// Create a particle vortex at the given position
  /// </summary>
  /// <param name="position"></param>
  public static ParticleSystem MakeVortex(Vector3 position)
  {
    if (instance == null)
    {
      Debug.LogError("There is no SpecialEffectsScript in the scene!");
      return null;
    }

    ParticleSystem effect = Instantiate(instance.vortexEffect) as ParticleSystem;
    effect.transform.position = position;

    return effect;
  }

  /// <summary>
  /// Create a new trail at the given position
  /// </summary>
  /// <param name="position"></param>
  /// <returns></returns>
  public static GameObject MakeTrail(Vector3 position)
  {
    if (instance == null)
    {
      Debug.LogError("There is no SpecialEffectsScript in the scene!");
      return null;
    }

    GameObject trail = Instantiate(instance.trailPrefab) as GameObject;
    trail.transform.position = position;

    return trail;
  }
}
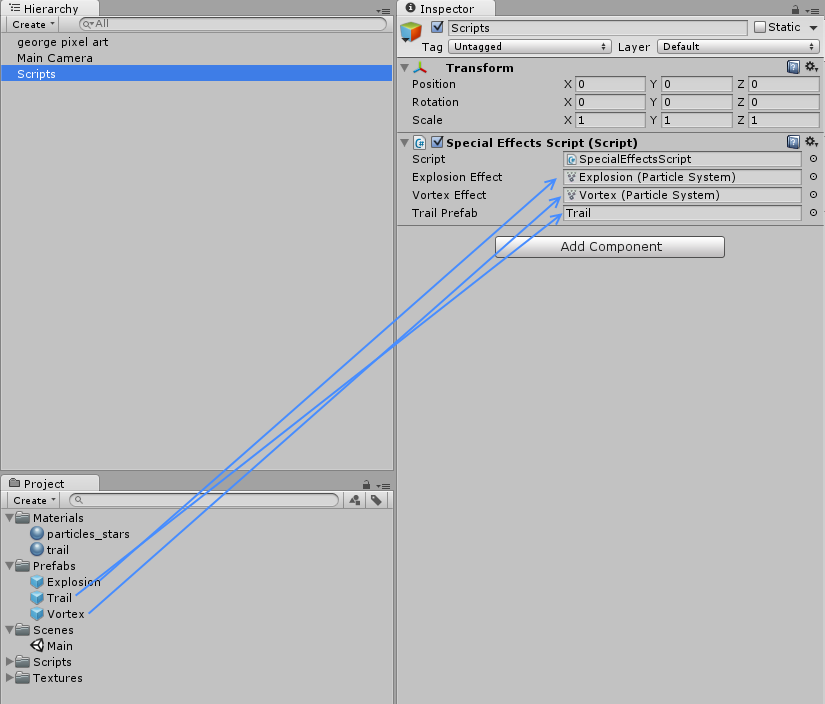
Add the script to the scene. Fill it with our prefabs.
Enough preparation. It’s time to dig deeper in the real topic of this tutorial: touch controls!
Gestures
The main purpose of our little game/app/demo is to trigger effects (e.g., explosion or vortex like those we made previously) when the player is touching the screen.
Depending on the touch gesture (tap, swipe, pinch to zoom, etc.), we will trigger a particular effect. This way, we will be able to see if the right gesture is recognized as it should be.
Script
Create a new empty script GameScript:
using UnityEngine;

public class GameScript : MonoBehaviour
{
  void Update()
  {
	// Here we will insert gesture recognition
  }
}
Add the script to the scene.
Touch inputs
Let’s handle some common touch gestures.
A bit of documentation
The generic Input class centralizes all types of inputs information in one place, be it a keyboard, a joystick or touches.
The Input.touches is a collection of Touch and contains the available touches event and their state at a given frame.
A Touch is a finger information container that we will inspect when we need to handle touch controls.
Tap
The tap is a brief pressure from a finger. Like a click.
In the GameScript’s Update() method, add:
void Update()
{
  // Look for all fingers
  for (int i = 0; i < Input.touchCount; i++)
  {
    Touch touch = Input.GetTouch(i);

    // -- Tap: quick touch & release
  	// ------------------------------------------------
    if (touch.phase == TouchPhase.Ended && touch.tapCount == 1)
    {
      // Touch are screens location. Convert to world
      Vector3 position = Camera.main.ScreenToWorldPoint(touch.position);

      // Effect for feedback
      SpecialEffectsScript.MakeExplosion((position));
    }
  }
}
We look at every finger registered in the Input class and if a finger has just been moved off the screen, we make an explosion where it was.
This would work with less code, but this way we make sure it’s not another sort of gesture (which comes next).
Note: touch.position is a screen location and not a world one. That’s why we must use Camera.main.ScreenToWorldPoint to get the location in the world coordinates.
The result:
Drag
Let’s make a trail when the user touches the screen and drags his finger across it.
First, add a new member that will contain the association between a finger and a trail:
private Dictionary<int, GameObject> trails = new Dictionary<int, GameObject>();
Then, inside Update(), add this code in the for loop:
// -- Drag
// ------------------------------------------------
if (touch.phase == TouchPhase.Began)
{
  // Store this new value
  if (trails.ContainsKey(i) == false)
  {
    Vector3 position = Camera.main.ScreenToWorldPoint(touch.position);
    position.z = 0; // Make sure the trail is visible

    GameObject trail = SpecialEffectsScript.MakeTrail(position);

    if (trail != null)
    {
      Debug.Log(trail);
      trails.Add(i, trail);
    }
  }
}
else if (touch.phase == TouchPhase.Moved)
{
  // Move the trail
  if (trails.ContainsKey(i))
  {
    GameObject trail = trails[i];

    Camera.main.ScreenToWorldPoint(touch.position);
    Vector3 position = Camera.main.ScreenToWorldPoint(touch.position);
    position.z = 0; // Make sure the trail is visible

    trail.transform.position = position;
  }
}
else if (touch.phase == TouchPhase.Ended)
{
  // Clear known trails
  if (trails.ContainsKey(i))
  {
    GameObject trail = trails[i];

    // Let the trail fade out
    Destroy(trail, trail.GetComponent<TrailRenderer>().time);
    trails.Remove(i);
  }
}
A bit verbose but quite simple:
- If the touch is a new one, we create a new trail and associate it to the finger via the dictionary.
- When the finger moves, if we have a trail associated to it, we also move the trail’s game object.
- When the finger is released, we destroy the trail.
The result:
Pinch
A pinch is the typical zoom/unzoom gesture. Two fingers getting closer or further.
We need some new variables to store the first position of the fingers. This way, we can compute the actual distance difference.
We also store the vortex effect (remember the Prefab we created before) played by the gesture to be able to update and delete it.
private Touch pinchFinger1, pinchFinger2;
private ParticleSystem vortex;
Add this to the Update() method, outside the for loop this time:
// -- Pinch
// ------------------------------------------------
// Works only with two fingers
if (Input.touchCount == 2)
{
  var finger1 = Input.GetTouch(0);
  var finger2 = Input.GetTouch(1);

  if (finger1.phase == TouchPhase.Began && finger2.phase == TouchPhase.Began)
  {
    this.pinchFinger1 = finger1;
    this.pinchFinger2 = finger2;
  }

  // On move, update
  if (finger1.phase == TouchPhase.Moved || finger2.phase == TouchPhase.Moved)
  {
    float baseDistance = Vector2.Distance(this.pinchFinger1.position, this.pinchFinger2.position);
    float currentDistance = Vector2.Distance(finger1.position, finger2.position);

    // Purcent
    float currentDistancePurcent = currentDistance / baseDistance;

    // Create an effect between the fingers if it doesn't exists
    if (vortex == null)
    {
      Vector3 finger1position = Camera.main.ScreenToWorldPoint(this.pinchFinger1.position);
      Vector3 finger2position = Camera.main.ScreenToWorldPoint(this.pinchFinger2.position);

      // Find the center between the two fingers
      Vector3 vortexPosition = Vector3.Lerp(finger1position, finger2position, 0.5f);
      vortex = SpecialEffectsScript.MakeVortex(vortexPosition);
    }

    // Take the base scale and make it smaller/bigger
    vortex.transform.localScale = Vector3.one * (currentDistancePurcent * 1.5f);
  }
}
else
{
  // Pinch release ?
  if (vortex != null)
  {
    // Create explosions!!!!!!!!!!!
    for (int i = 0; i < 10; i++)
    {
      var explosion = SpecialEffectsScript.MakeExplosion(vortex.transform.position);
      explosion.transform.localScale = vortex.transform.localScale;
    }

    // Destroy vortex
    Destroy(vortex.gameObject);
  }

  // ...
  // previous for loop HERE
  // ...
}
Yes, the pinch is slightly more complicated, mainly because we don’t want it do be taken for anything else.
If two fingers are on the screen, we create a new vortex between the two positions. Then, we declare that the gesture is a pinch. Finally, if the fingers move, we also move and scale the vortex object.
Eventually, and as soon as one finger is missing, the vortex is turned into some explosions. The gesture is over.
Note from Matthieu: Michael Bay would be proud.
Full script
using System.Collections.Generic;
using UnityEngine;

public class GameScript : MonoBehaviour
{
  private Dictionary<int, GameObject> trails = new Dictionary<int, GameObject>();
  private Touch pinchFinger1, pinchFinger2;
  private ParticleSystem vortex;

  void Update()
  {
    // -- Pinch
    // ------------------------------------------------
    // Works only with two fingers
    if (Input.touchCount == 2)
    {
      var finger1 = Input.GetTouch(0);
      var finger2 = Input.GetTouch(1);

      if (finger1.phase == TouchPhase.Began && finger2.phase == TouchPhase.Began)
      {
        this.pinchFinger1 = finger1;
        this.pinchFinger2 = finger2;
      }

      // On move, update
      if (finger1.phase == TouchPhase.Moved || finger2.phase == TouchPhase.Moved)
      {
        float baseDistance = Vector2.Distance(this.pinchFinger1.position, this.pinchFinger2.position);
        float currentDistance = Vector2.Distance(finger1.position, finger2.position);

        // Purcent
        float currentDistancePurcent = currentDistance / baseDistance;

        // Create an effect between the fingers if it doesn't exists
        if (vortex == null)
        {
          Vector3 finger1position = Camera.main.ScreenToWorldPoint(this.pinchFinger1.position);
          Vector3 finger2position = Camera.main.ScreenToWorldPoint(this.pinchFinger2.position);

          // Find the center between the two fingers
          Vector3 vortexPosition = Vector3.Lerp(finger1position, finger2position, 0.5f);
          vortex = SpecialEffectsScript.MakeVortex(vortexPosition);
        }

        // Take the base scale and make it smaller/bigger
        vortex.transform.localScale = Vector3.one * (currentDistancePurcent * 1.5f);
      }
    }
    else
    {
      // Pinch release ?
      if (vortex != null)
      {
        // Create explosions!!!!!!!!!!!
        for (int i = 0; i < 10; i++)
        {
          var explosion = SpecialEffectsScript.MakeExplosion(vortex.transform.position);
          explosion.transform.localScale = vortex.transform.localScale;
        }

        // Destroy vortex
        Destroy(vortex.gameObject);
      }

      // Look for all fingers
      for (int i = 0; i < Input.touchCount; i++)
      {
        Touch touch = Input.GetTouch(i);

        // -- Tap: quick touch & release
        // ------------------------------------------------
        if (touch.phase == TouchPhase.Ended && touch.tapCount == 1)
        {
          // Touch are screens location. Convert to world
          Vector3 position = Camera.main.ScreenToWorldPoint(touch.position);

          // Effect for feedback
          SpecialEffectsScript.MakeExplosion((position));
        }
        else
        {
          // -- Drag
          // ------------------------------------------------
          if (touch.phase == TouchPhase.Began)
          {
            // Store this new value
            if (trails.ContainsKey(i) == false)
            {
              Vector3 position = Camera.main.ScreenToWorldPoint(touch.position);
              position.z = 0; // Make sure the trail is visible

              GameObject trail = SpecialEffectsScript.MakeTrail(position);

              if (trail != null)
              {
                Debug.Log(trail);
                trails.Add(i, trail);
              }
            }
          }
          else if (touch.phase == TouchPhase.Moved)
          {
            // Move the trail
            if (trails.ContainsKey(i))
            {
              GameObject trail = trails[i];

              Camera.main.ScreenToWorldPoint(touch.position);
              Vector3 position = Camera.main.ScreenToWorldPoint(touch.position);
              position.z = 0; // Make sure the trail is visible

              trail.transform.position = position;
            }
          }
          else if (touch.phase == TouchPhase.Ended)
          {
            // Clear known trails
            if (trails.ContainsKey(i))
            {
              GameObject trail = trails[i];

              // Let the trail fade out
              Destroy(trail, trail.GetComponent<TrailRenderer>().time);
              trails.Remove(i);
            }
          }
        }
      }
    }
  }
}
Testing & deployment
To test on a device, see our deployment chapter in our previous tutorial.
Contact and feedback
If you find a typo, a mistake or a misspelling, let us know on our twitter. You can also contact us by mail.
If you want further informations about a specific topic, or a clarification on this tutorial, we would be happy to hear you too.
Finally, you can follow us on twitter if you like what we do. :)
This tutorial was redacted by Damien, and edited by Matthieu. We hope you will enjoy it.


