Shooting (2/2)
Our magnificent ship is now shooting innocent flying octopuses.
It can’t stay that way. They need to respond. To shoot back. To fight for freedo… Oups. Sorry.
Using what we did in the last part, we will modify the enemy behavior so it can shoot projectiles too.
The enemy projectile
We will create a new projectile using this sprite:

(Right click to save the image)
If you are as lazy as I am, duplicate the “PlayerShot” prefab, rename it to “EnemyShot1” and change the sprite with the new one above.
To duplicate, you can create an instance by doing a drag and drop on the scene, renaming the created game object and finally saving it as a Prefab.
Or you could simply duplicate the Prefab directly inside the folder with the cmd+D (OS X) or ctrl+D (Windows) shortcuts.
If you like to do it the hard way, you could also recreate a whole new sprite, rigibody, collider with trigger, etc.
The right scale is (0.35, 0.35, 1).
You should have something like this:
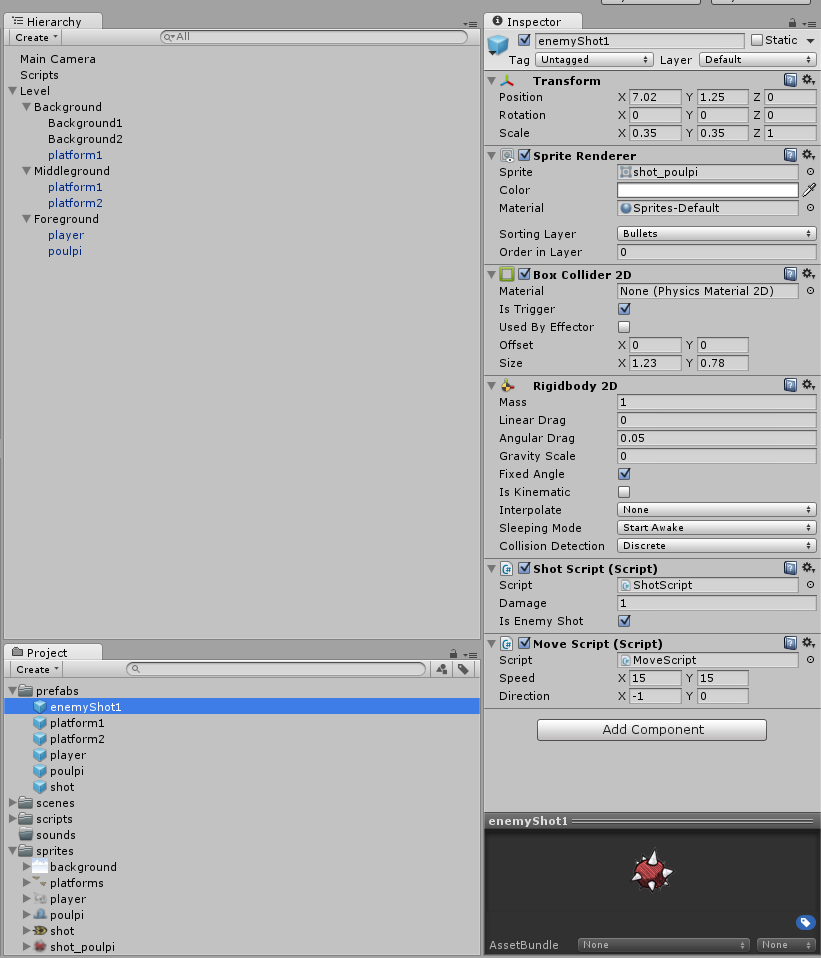
If you hit “Play”, the shot will move and potentially destroy the enemy. This is because of the “ShotScript” properties (which is harmful for the Poulpi by default).
Don’t change them. Remember the “WeaponScript” from the last part? It will set those values properly.
We have an “EnemyShot1” Prefab. Remove the instances from the scene if there are some.
Firing
Like we did for the player, we need to add a weapon to the enemy and make him call Attack(), thus creating projectile.
New scripts and assignments
- Add a “WeaponScript” to the enemy.
- Drag and drop the “EnemyShot1”
Prefabinto the “Shot Prefab” variable of the script. - Create a new script called “EnemyScript”. It will simply try to trigger the weapon at each frame. A kind of auto-fire.
using UnityEngine;

/// <summary>
/// Enemy generic behavior
/// </summary>
public class EnemyScript : MonoBehaviour
{
  private WeaponScript weapon;

  void Awake()
  {
    // Retrieve the weapon only once
    weapon = GetComponent<WeaponScript>();
  }

  void Update()
  {
    // Auto-fire
    if (weapon != null && weapon.CanAttack)
    {
      weapon.Attack(true);
    }
  }
}
Attach this script to our enemy.
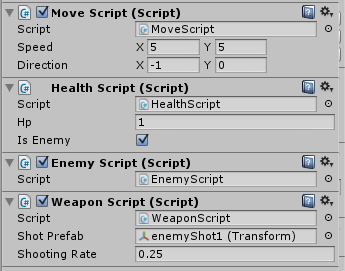
You should have this (observe the slight increase of the shooting rate to 0.75):
Remark: if you are modifying the game object in the scene, remember to save all the changes to the Prefab using the “Apply” button on the top right of the “Inspector”.
Try to play and look!
Okay, it’s kinda working. The weapon is firing on its right because that’s what we told it to do.
If you rotate the enemy, you can make it fire on its left, but, erm… the sprite is also upside down. That’s not what we want.

So what?! Obviously, we made this mistake for a reason.
Shooting in any direction
The “WeaponScript” has been made in a particular way: you can choose its direction simply by rotating the game object onto which it is attached. We’ve seen that when we rotated the enemy sprite before.
The trick is to create an empty game object as a child of the enemy Prefab.
We need to:
- Create an “Empty Game Object”. Call it “Weapon”.
- Delete the “WeaponScript” attached to your enemy prefab.
- Add a “WeaponScript” to the “Weapon” object and set the shot prefab property like you did before.
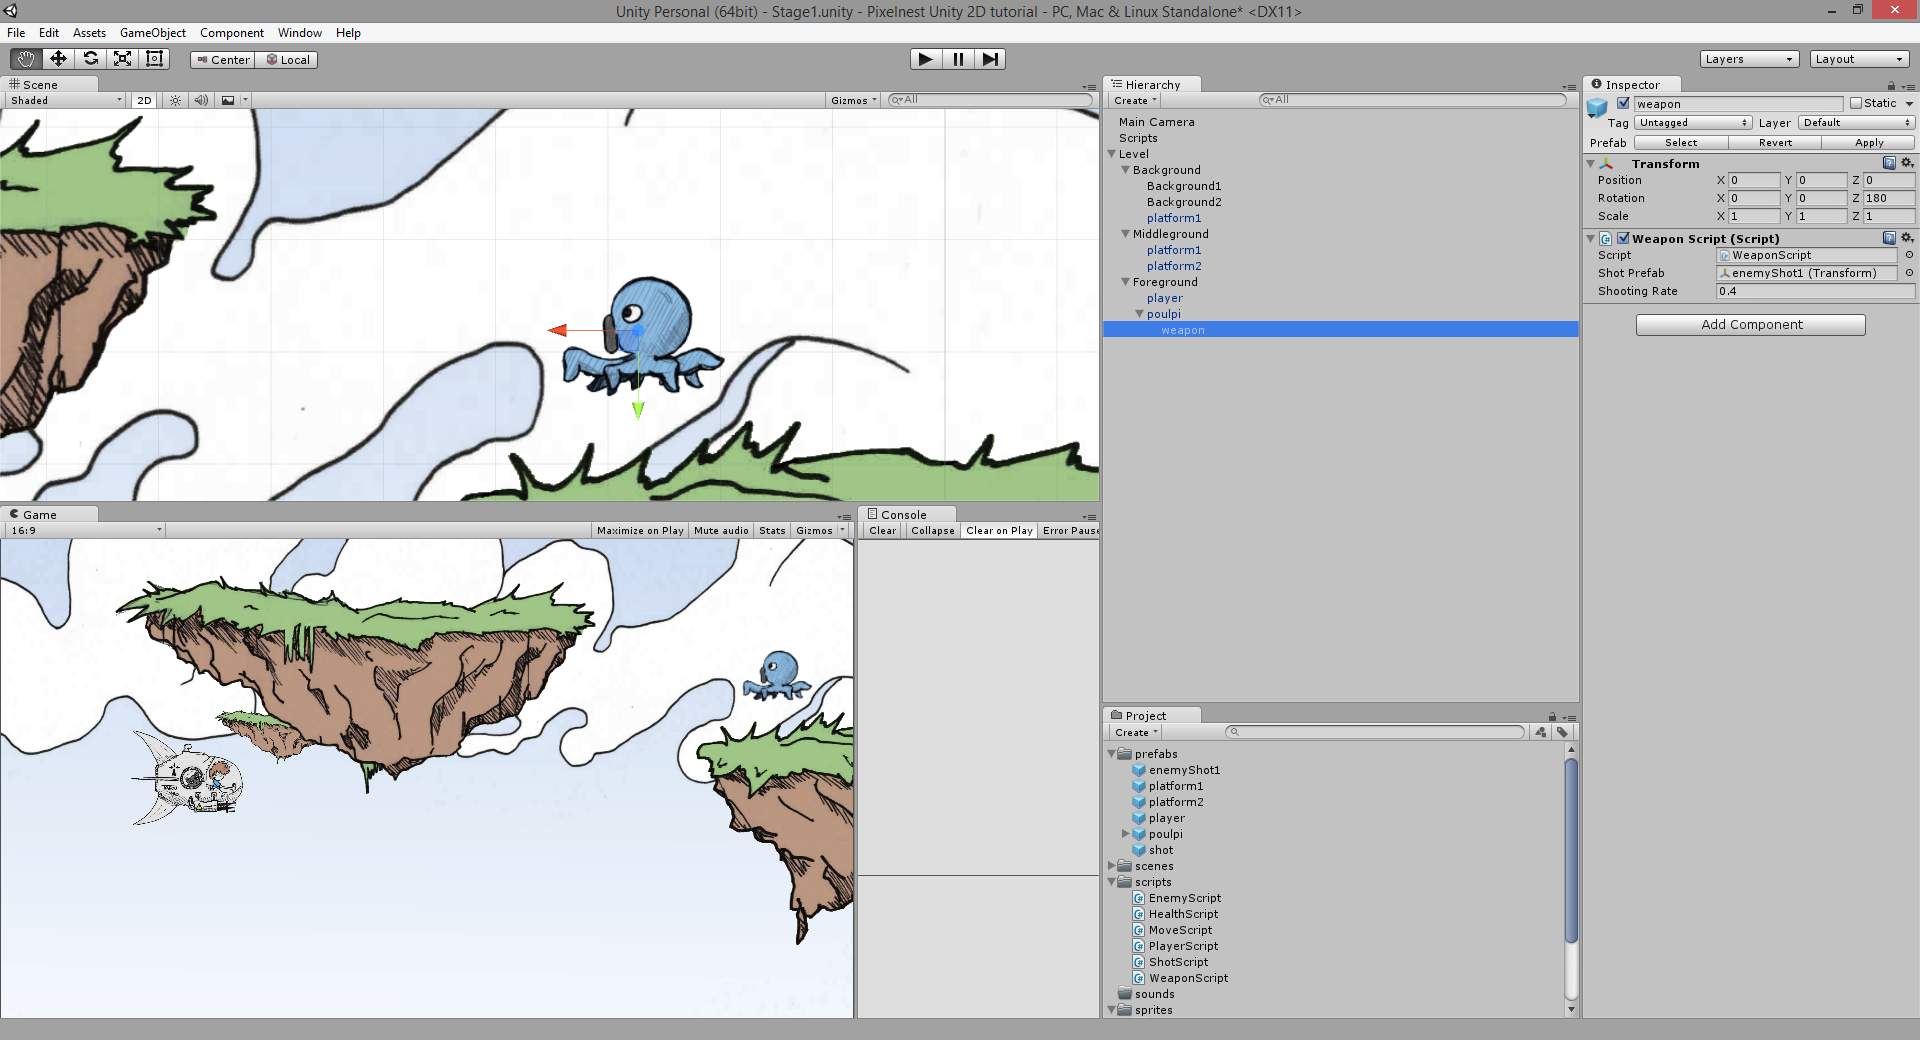
- Rotate the “Weapon” to
(0, 0, 180).
If you did the process on the game object (and not the Prefab), do not forget to “Apply” the changes.
You should have this:
However, we have a small change to make on the “EnemyScript” script.
In its current state, the “EnemyScript” call to GetComponent<WeaponScript>() is going to return null. Indeed, the “WeaponScript” is not attached to the same game object anymore.
Fortunately, Unity provides a method that can also look in the children hierarchy of the game object calling it: the GetComponentInChildren<Type>() method.
Note: like for GetComponent<>(), GetComponentInChildren<>() also exists in a plural form : GetComponentsInChildren<Type>(). Notice the s after “Component”. This method returns a list instead of the first corresponding component.
In fact, just for fun, we have also added a way to manage multiple weapons. We are just manipulating a list instead of a single instance of the component.
Take a look at the whole “EnemyScript”:
using System.Collections.Generic;
using UnityEngine;

/// <summary>
/// Enemy generic behavior
/// </summary>
public class EnemyScript : MonoBehaviour
{
  private WeaponScript[] weapons;

  void Awake()
  {
    // Retrieve the weapon only once
    weapons = GetComponentsInChildren<WeaponScript>();
  }

  void Update()
  {
    foreach (WeaponScript weapon in weapons)
    {
      // Auto-fire
      if (weapon != null && weapon.CanAttack)
      {
        weapon.Attack(true);
      }
    }
  }
}
Finally, update the shot speed by tweaking the public property of the “MoveScript” of the “enemyShot1” Prefab. It should move faster than the Poulpi speed:

Great, we have a super dangerous Poulpi now.
Bonus: firing in two directions
Firing in two directions is just a few clicks and a duplication in the editor. It doesn’t involve any script:
- Add another weapon to the enemy (by duplicating the first “Weapon”).
- Change the rotation of the second “Weapon”.
The enemy should fire in two directions now.
A possible result:
It’s a good example of using Unity properly: by creating independent scripts like this one and making public some useful variables, you can reduce the amount of code drastically. Less code means less errors.
Hurting the player
Our Poulpies are dangerous, right? Erm, nope. Even if they can shoot, it won’t harm the player character.
We are still invincible. No challenge there.
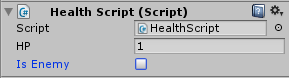
Simply add a “HealthScript” on the player. Make sure to uncheck the “IsEnemy” field.
Run the game and observe the difference:
Bonus
We are going to give you some hints to go further on the shooting aspect of your game. You can skip this part if you are not interested into more specific shmup thoughts.
Player-enemy collision
Let’s see how we can handle the collision between the player and an enemy, as it is quite frustrating to see them block each other without consequences…
The collision is the result of the intersection of two non-triggers Colliders 2D. We simply need to handle the event OnCollisionEnter2D in our PlayerScript:
//PlayerScript.cs
//....

void OnCollisionEnter2D(Collision2D collision)
  {
    bool damagePlayer = false;

    // Collision with enemy
    EnemyScript enemy = collision.gameObject.GetComponent<EnemyScript>();
    if (enemy != null)
    {
      // Kill the enemy
      HealthScript enemyHealth = enemy.GetComponent<HealthScript>();
      if (enemyHealth != null) enemyHealth.Damage(enemyHealth.hp);

      damagePlayer = true;
    }

    // Damage the player
    if (damagePlayer)
    {
      HealthScript playerHealth = this.GetComponent<HealthScript>();
      if (playerHealth != null) playerHealth.Damage(1);
    }
  }
On collision, we damage both the player and the enemy by using the HealthScript component. By doing so, everything related to the health/damage behavior is linked to it.
Pool of projectiles
As you play, you can observe in the “Hierarchy” that game objects are being created and removed only after 20 seconds (unless they hit a player or an enemy).
If you plan to do a danmaku which needs a LOT of bullets, this is not a viable technique anymore.
One of the solution to handle a multitude of bullets is to use a pool. Basically, you can use an array of bullets limited in size. When the array is full, you delete the oldest object and replace it by a new one.
We won’t implement one here but it is quite simple. We used the same technique on a painting script.
You could also reduce the time to live of a bullet so it will disappear more quickly.
Attention: keep in mind that using the Instantiate method heavily has a cost. You need to use it carefully.
Bullet behavior
A good shooter should have memorable fights.
Some libraries, like BulletML, allows you to easily define some complex and spectacular bullet patterns.

If you are interested in making a complete Shoot’Em Up game, have a look at our BulletML for Unity plugin.
Delaying shots
Add a few armed enemies in the scene and run the game. You should see how synchronous all enemies are.
We could simply add a delay to the weapon: initialize the cooldown to something else than 0. You could use an algorithm or simply put a random number instead.
The speed of the enemies can also be altered with a random value.
Once again, it’s up to you. It depends solely on what you want to achieve with your gameplay.
Next step
We have just learned how to give a weapon to our enemies. We’ve also seen how to reuse some scripts to improve the gameplay.
We have an almost complete shooter! A very basic and hardcore one, admittedly.

Don’t hesitate to add enemies, weapons and to experiment with the properties.
In the next chapter, we will learn how to enhance the background and the scene to create a big level.
