Create a player and its enemies
In the previous chapter, we have added a background and some props to our scene. It is time to add some useful game elements, like the player!
Creating the player
Creating a player controllable entity needs some elements : a sprite, a way to control it and a way to let it interact with the world.
We will explore this process step by step.
Let’s begin with the sprite.
Add a sprite
Here is the image that we will use:
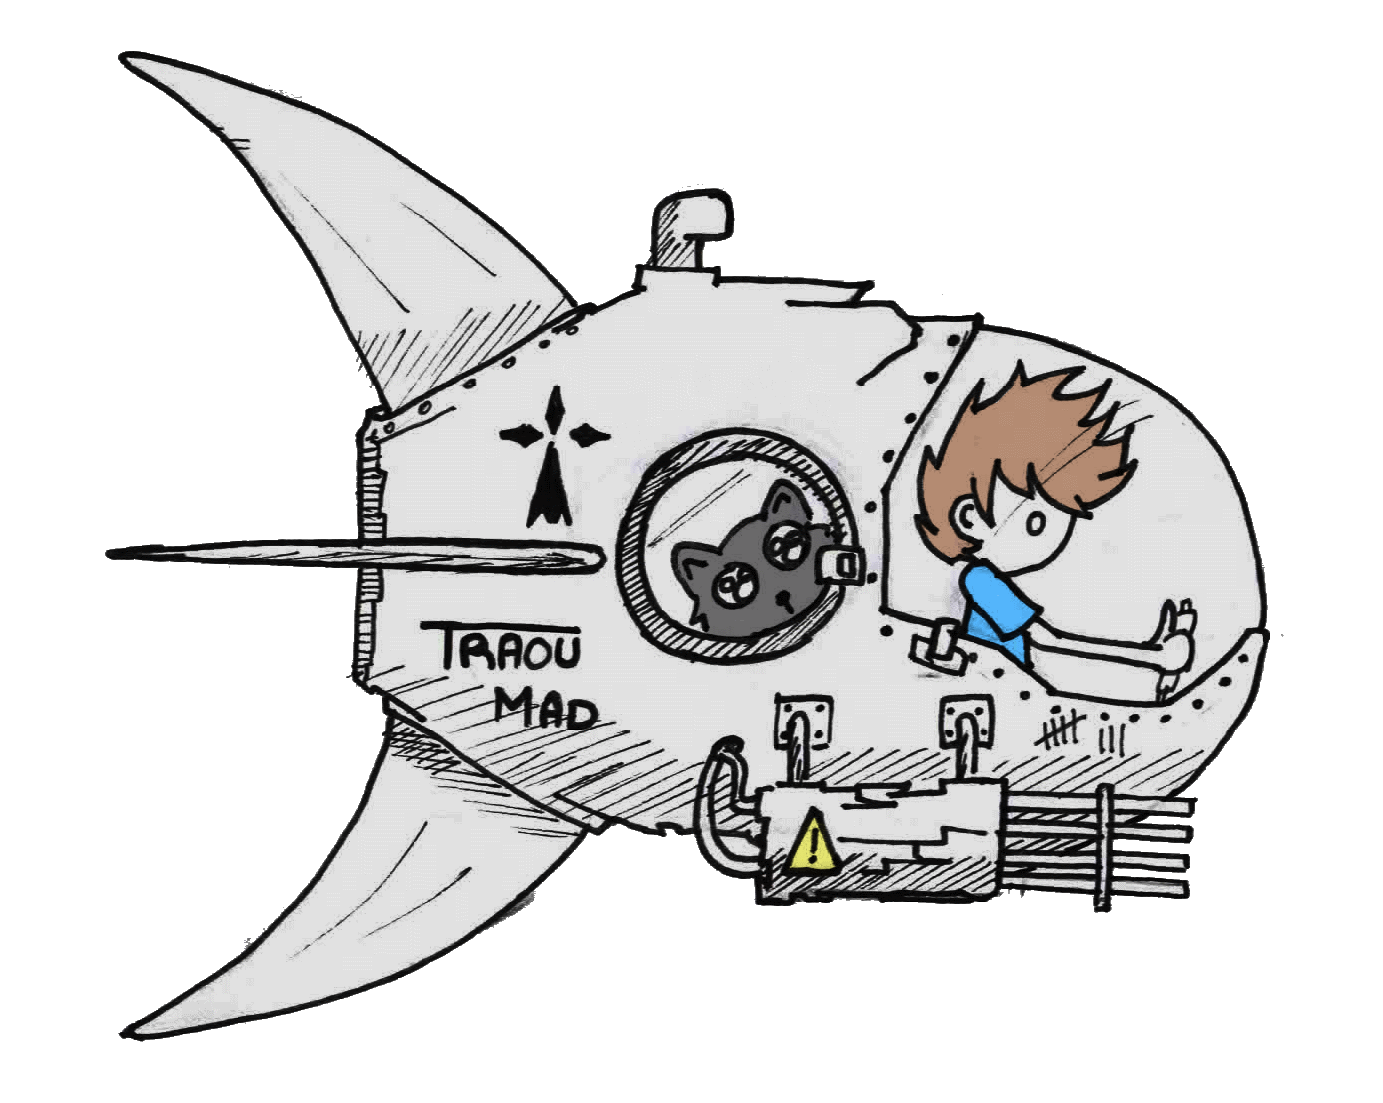
(Right click to save the image)
-
Copy the player image to the “Textures” folder.
-
Create a new
Sprite. Name it “Player”. -
Select the sprite to display in the “Sprite” property of the “Sprite Renderer” component.
If you have any trouble, refer to the previous part. We did exactly the same procedure for the background and props.
-
Select the “Player” sprite layer.
-
Place the player in the “Foreground” object.
-
Change its scale.
(0.2, 0.2, 1)should be fine.
A word about components
We have just talked about a “Sprite Renderer” component. If you haven’t remarked, a game object is composed of a few components, visibles in the “Inspector” pane.
By default, an empty game object looks like:
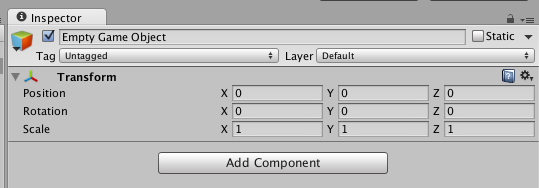
This object has only one component: a “Transform”. This component is required and cannot be disabled or removed from an object.
You can add as many components as you want on an object. A script is added as a component, for example. Most of the components can be enabled or disabled during the lifetime of the object.

(You can click on the checkbox to disabled it. You can right-click on a component to reset it, remove it, etc.)
Note: components can interact with other components. If an object has a component that requires another component of an object to work with, you can just drag the whole object inside this component and it will find the correct one in the object.
A “Sprite Renderer” is a component that is able to display a sprite texture.
Now that we have learned about the concept of component, let’s add one to the player!
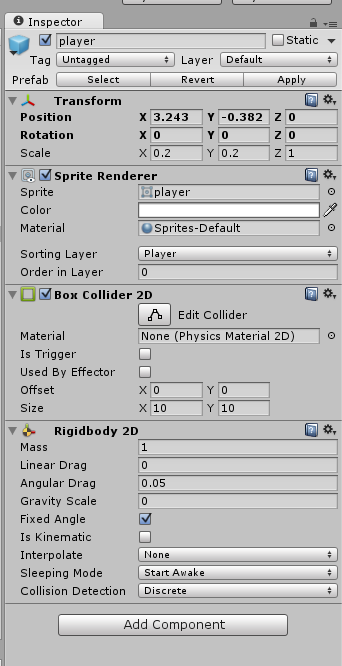
Add a Box Collider
Click on the “Add Component” button of the player object. Choose a “Box Collider 2D”.
This will represent the player hitbox.
You can see the collider in the editor “Scene” view and tweak its size in the “Inspector” with the “Size” property.
Tip: There is another way to edit a box collider. Select a game object with a box collider and enable the “Edit Collider” toggle in the component. You can observe that the box collider (the green rectangle) is now showing four small handles onto. Drag one of them to change the shape of the box.
Be careful, the blue rectangle represents the Transform component of your game object, not the collider.
We will set the size of the collider to (10, 10).
It’s way too large for a real shmup but it’s still smaller than the sprite:
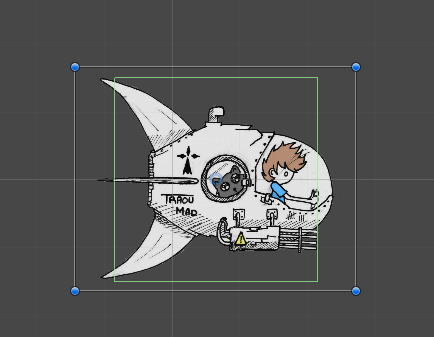
For the time being, it will be enough.
Tip: if you plan to make a shmup, spend a lot of time tweaking your hitboxes. In general, it should fit perfectly a small element inside the player sprite. What about the ship window here? You could also change the collider shape — with a “Circle Collider 2D” for example. It changes nothing to the behavior thanks to Unity, but it will slightly improve the gameplay.
Save the player game object to a prefab. You now have a basic player entity!

Polygon Collider 2D
If you want a super precise and custom shaped hitbox, Unity offers a “Polygon Collider 2D” component. It’s less efficient but allows you to set the shape exactly like you want.
The Rigidbody magic
There is one last component to add on our player: a “Rigidbody 2D”.
This will tell to the physics engine how to handle the game object. Furthermore, it will also allow collision events to be raised in scripts.
- Select your
Playergame object in the “Hierarchy”. - Add a “Rigidbody 2D” component.
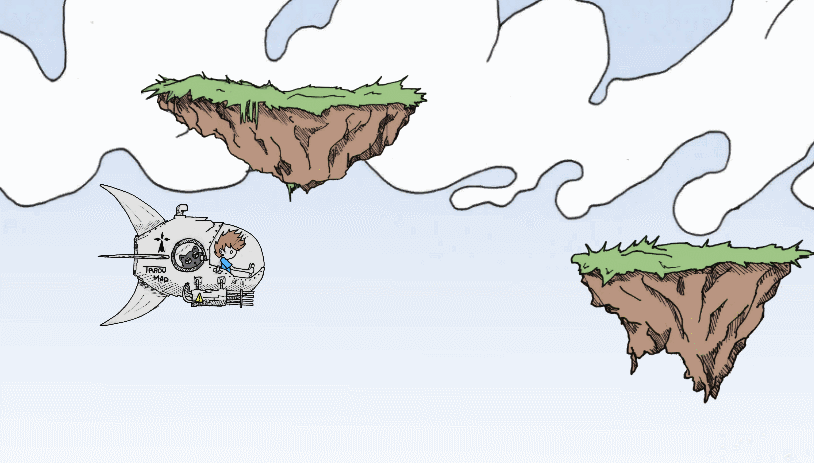
Now, hit play and observe:
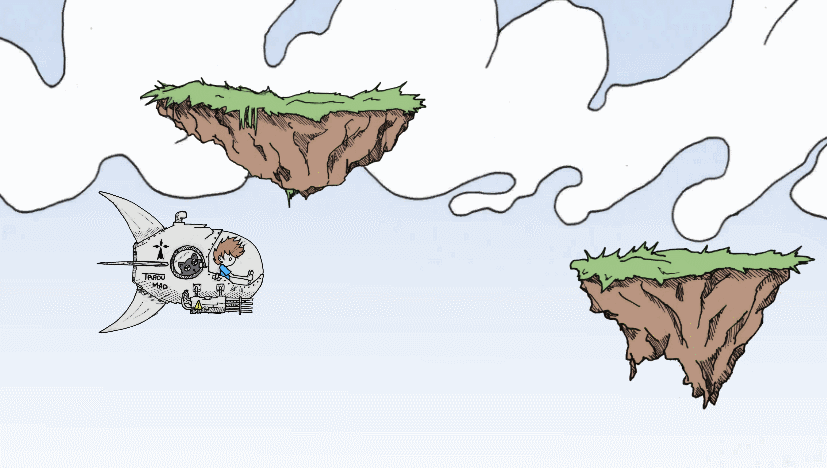
The ship is falling!
Say hello to our beloved gravity. :)
As new scenes come with a default gravity and rigidbodies add a mass to an object, the ship is now attracted to the bottom.
The default gravity of Unity is 9.81, i.e. the earth gravity.
Gravity can be used in some kind of games, but we don’t want to have to handle it here. Fortunately, it is simple to disable gravity on a rigidbody. Just set “Gravity Scale” to 0. That’s it, the ship is flying again.
You may also want to tick the “Fixed Angles” property as we don’t want our ship to rotate because of the physics.
The complete settings:
Moving the player
Time for some scripting! So far, we didn’t code anything. That’s the power of (love) Unity.
Inside Unity, create a new C# script in your “Scripts” folder. Call it “PlayerScript”.
Remark: you can do it in JavaScript too. As we said before, code snippets will be in C#, but it is quite easy to translate the code from a language to another.
Open your favorite editor or use the “Sync” submenu (Click on “Assets” in the menubar, then on “Sync MonoDevelop Project”) to edit the script.
“Sync MonoDevelop Project”: this submenu is a bit weird. First, the name does not change, even if you have set up another editor.
We also recommend to use this menu the first time you have to script, because Unity will create the solutions and link the Unity libraries in them (for Visual Studio, Xamarin Studio or MonoDevelop).
If you simply open the script instead, the compiler of your IDE will likely catch some errors because it won’t know Unity.
It doesn’t matter because you will never compile directly with it, but it is nice to have the autocompletion on the Unity objects and a first pass on errors.
If you come from XNA, you won’t be lost.
You can define some methods (called “Message” as we are not using C# inheritance system) that Unity will recognize and execute when needed.
Default scripts come with the Start and Update methods. Here is a short list of the most used “Message” functions:
Awake()is called once when the object is created. See it as replacement of a classic constructor method.Start()is executed afterAwake(). The difference is that theStart()method is not called if the script is not enabled (remember the checkbox on a component in the “Inspector”).Update()is executed for each frame in the main game loop.FixedUpdate()is called at every fixed framerate frame. You should use this method overUpdate()when dealing with physics (“RigidBody” and forces).Destroy()is invoked when the object is destroyed. It’s your last chance to clean or execute some code.
You also have some functions for the collisions :
OnCollisionEnter2D(CollisionInfo2D info)is invoked when another collider is touching this object collider.OnCollisionExit2D(CollisionInfo2D info)is invoked when another collider is not touching this object collider anymore.OnTriggerEnter2D(Collider2D otherCollider)is invoked when another collider marked as a “Trigger” is touching this object collider.OnTriggerExit2D(Collider2D otherCollider)is invoked when another collider marked as a “Trigger” is not touching this object collider anymore.
Fiou… This explanation was a bit boring, but unavoidable. Sorry for that.
Note about the 2D suffix: you should have observed now that almost anything we talked about was suffixed with “2D”. A “Box Collider 2D”, a “Rigidbody 2D”, the “OnCollisionEnter2D” or “OnTriggerEnter2D” methods, etc. These new components or methods have appeared with Unity 4.3.
By using them, you are adopting the new physics engine integrated in Unity 4.3 for 2D games (based on Box2D) instead of the one for 3D games (PhysX). The two engines are sharing similar concepts and objects, but they don’t work exactly the same. If you start to work with one (favor Box2D for 2D games), stick to it. This is why we use all the objects or methods with a “2D” suffix.
We will get back on some of them in details when we will be using them.
For our player script, we will add some simple controls: the arrow keys will move the ship.
using UnityEngine;

/// <summary>
/// Player controller and behavior
/// </summary>
public class PlayerScript : MonoBehaviour
{
    /// <summary>
    /// 1 - The speed of the ship
    /// </summary>
    public Vector2 speed = new Vector2(50, 50);

    // 2 - Store the movement and the component
    private Vector2 movement;
    private Rigidbody2D rigidbodyComponent;

    void Update()
    {
        // 3 - Retrieve axis information
        float inputX = Input.GetAxis("Horizontal");
        float inputY = Input.GetAxis("Vertical");

        // 4 - Movement per direction
        movement = new Vector2(
          speed.x * inputX,
          speed.y * inputY);

    }

    void FixedUpdate()
    {
        // 5 - Get the component and store the reference
        if (rigidbodyComponent == null) rigidbodyComponent = GetComponent<Rigidbody2D>();

        // 6 - Move the game object
        rigidbodyComponent.velocity = movement;
    }
}
(The numbers in the comments refer to the explanations below)
Note about C# conventions: look at the speed member visibility: it’s public. In C#, a member variable should be private in order to keep the internal representation of the class private.
But exposing it as a public variable allows you to modify it in Unity through the “Inspector” pane, even during the game execution. This is a powerful feature of Unity, letting you tweaks the gameplay without coding.
Remember that we are doing scripting here, not classic C# programming. This implies to break some rules and conventions.
Explanations
- We first define a public variable that will appear in the “Inspector” view of Unity. This is the speed applied to the ship.
- The fields we need.
- We use the default axis that can be redefined in “Edit” -> “Project Settings” -> “Input”. This will return a value between
[-1, 1],0being the idle state, 1 the right, -1 the left. - We multiply the direction by the speed.
- We need to access the rigidbody component, but we can avoid to do it every frame by storing a reference.
- We change the rigidbody velocity. This will tell the physic engine to move the game object. We do that in
FixedUpdate()as it is recommended to do everything that is physics-related in there.
Tutorial update: if you have read this tutorial before, you may remember that we were using transform.Translate directly. This was working because translations were slow, but it is not recommended since it can mess up the physics (for the physic engine, a translation is like a teleportation, so there is no collision).
Thanks to your feedback, we updated the scripts to help people learn the good practices of game object movement.
Now, attach the script to the game object.
Tip: you can attach a script to a game object by dragging the script from the “Project” view on the game object in the “Hierarchy”. You can also click on “Add Component” and find it manually.
Hit the “Play” button in top of the editor. The ship is moving and your game is running! Congratulations, you have just made the equivalent of a “Hello, World!” for a game :)
Try to tweak the speed: click on the player, modify the speed values in the “Inspector” and look at the consequences.

Be careful: modifications when the game is executed (or played) are lost when you stop it! It’s a great tool for tweaking the gameplay, but remember what you are doing if you want to keep the changes.
However, this effect is also handy: you can destroy your game completely during the execution to test something new, without being afraid of breaking your real project.
This was the first sign of life in our game! Let’s add more!
The first enemy
A shmup is nothing without tons of enemies to blow up.
Let’s use an innocent octopus, named “Poulpi”:
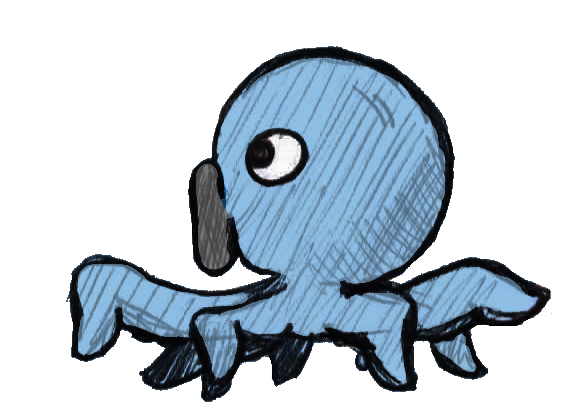
(Right click to save the image)
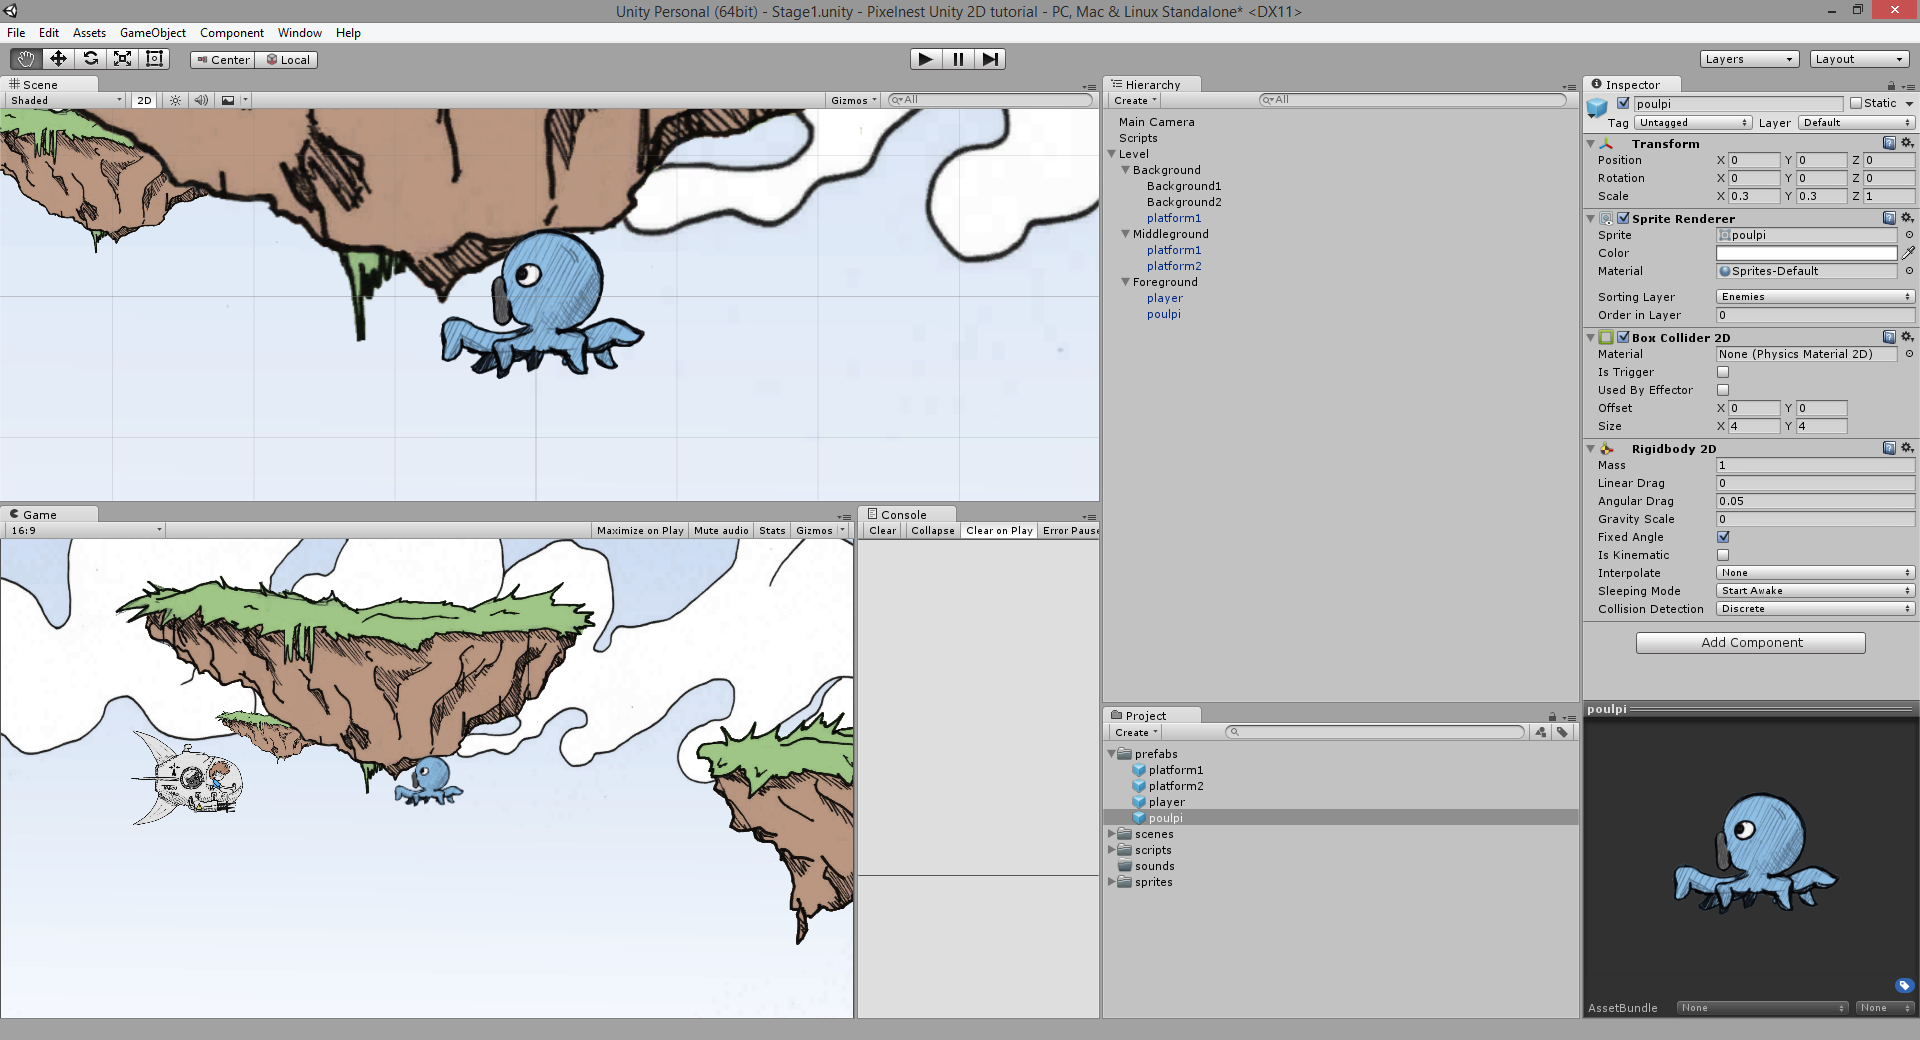
Sprite
Time to create a new sprite! Again:
- Copy the image to the “sprites” folder.
- Create a new
Spriteusing this image. - Set the sprite layer to “Enemies”
- Change the “Scale” property of the
Transformto(0.3, 0.3, 1). - Add a “Box Collider 2D” with a size of
(4, 4). - Add a “Rigidbody 2D” with a “Gravity Scale” of
0and “Fixed Angles” ticked.
Save the prefab… and that’s it!
Script
We will script a simple behavior: the Poulpi will just move in a direction.
Create a new script “MoveScript”.
We could call it “EnemyScript” but we plan to reuse it later in another context.
Note: the modularity provided by Unity’s component-based system offers a great way to separate scripts with different features. Of course, you can still have one giant script doing everything with a lot of parameters. It’s your choice, but we highly recommend against doing that.
We will copy some parts of what we have already written in the “PlayerScript” for movement. We will add another designer (a public member you can alter in the “Inspector”) variable for the direction:
using UnityEngine;

/// <summary>
/// Simply moves the current game object
/// </summary>
public class MoveScript : MonoBehaviour
{
    // 1 - Designer variables

    /// <summary>
    /// Object speed
    /// </summary>
    public Vector2 speed = new Vector2(10, 10);

    /// <summary>
    /// Moving direction
    /// </summary>
    public Vector2 direction = new Vector2(-1, 0);

    private Vector2 movement;
    private Rigidbody2D rigidbodyComponent;

    void Update()
    {
        // 2 - Movement
        movement = new Vector2(
          speed.x * direction.x,
          speed.y * direction.y);
    }

    void FixedUpdate()
    {
        if (rigidbodyComponent == null) rigidbodyComponent = GetComponent<Rigidbody2D>();

        // Apply movement to the rigidbody
        rigidbodyComponent.velocity = movement;
    }
}
Attach the script to the Poulpi. Hit “Play”: it should move just like below.
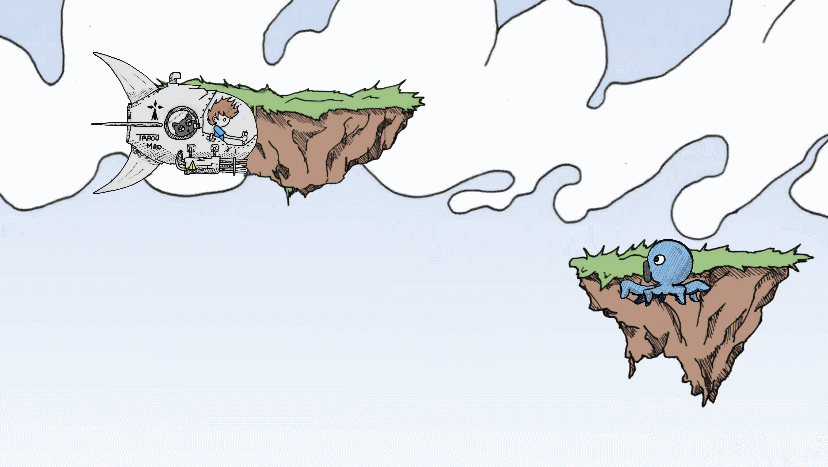
If you move the player in front of the enemy, the two sprites will collide. They will just block each other as we didn’t define the collision behavior yet.
Next step
You have learned how to add a player entity, controlled by the keyboard. Then, we created a basic enemy with a rudimentary AI.
Now, we want to destroy that moving thing! And for that, we need ammo!
