Making animations with Unity 2D (2/2)
We made some animation clips for our new enemy. But, for now, they are never used.
Indeed, a clip is just a sheet containing informations on how to animate an object. It’s never called or triggered.
Enter the “Animator”.
An “Animator” is a component that you put on an object, which itself references an “Animator Controller”. The “Animator Controller” is a state machine that manages all the animations of an object and the relations between them.
In this chapter, we are going to add the “Boss” object into the scene and animate it. By doing so, we will learn how to use the “Animator”. Plus, we will have some scripts to add in order to have a proper behavior for this special character: stop the level, create a pattern for the shots and trigger the animations.
Warning: this part of the tutorial has not been updated to Unity 5.
Animator
You may have seen that your “Boss” object you were working on had automatically received a new component: an “Animator”.
At the same time, you may also have seen that a new file was added to your “Animations” folder, named just like your object. It’s an “Animator Controller”.
Now, observe the “Controller” property of your “Animator” component:
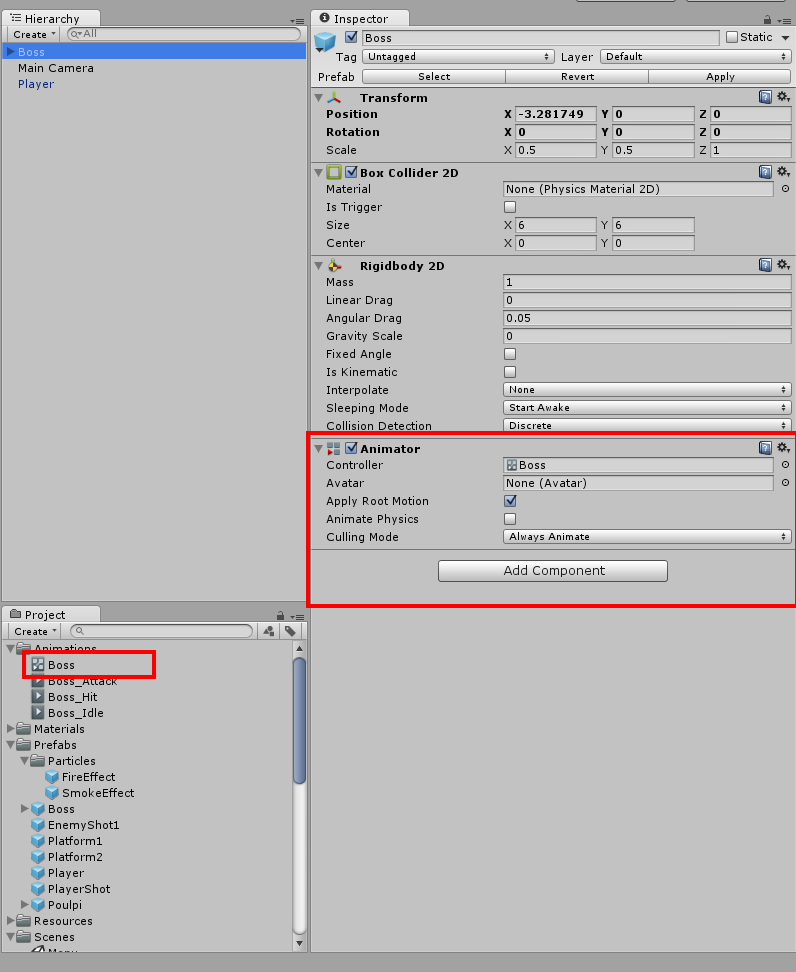
The file “Boss” is the controller. You can check that by clicking onto the controller field — it will highlight the linked file:

This controller is where we will define how and when Unity should play the animation clips.
Basically, the “Animator” component is simply a link between an object and an “Animator Controller”. This component can be retrieved and manipulated through the code.
If your “Boss” prefab has no “Animator” component, add it manually and drag the “Boss” controller inside the property.
Options: the “Animator” component has some other options. The “Apply Root Motion” should probably be disabled when using the animations the way we do in this tutorial. Yet, it doesn’t matter here because we have a very simple object with no gravity.
Inside an animator
As it was not confusing enough, we need to open the window called “Animator” (and not “Animation” this time).
You can double click on the controller file (“Animations/Boss”) to open the controller, or you can find it in the “Window” menu:

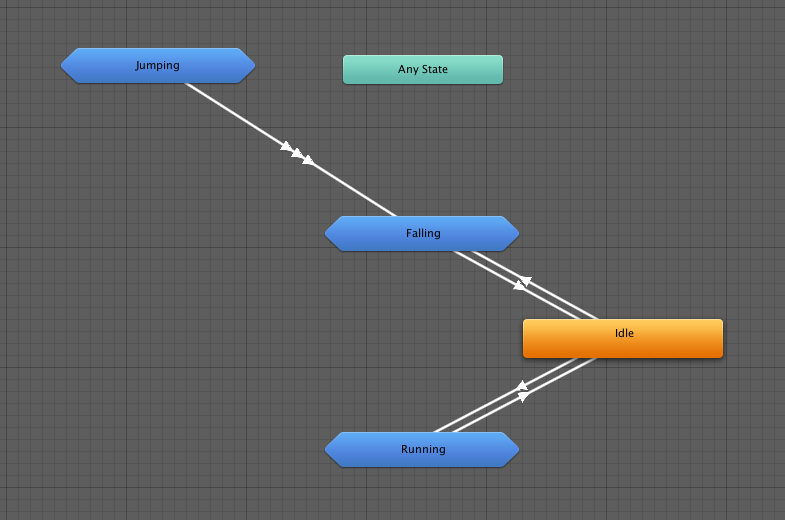
You should get something like this:
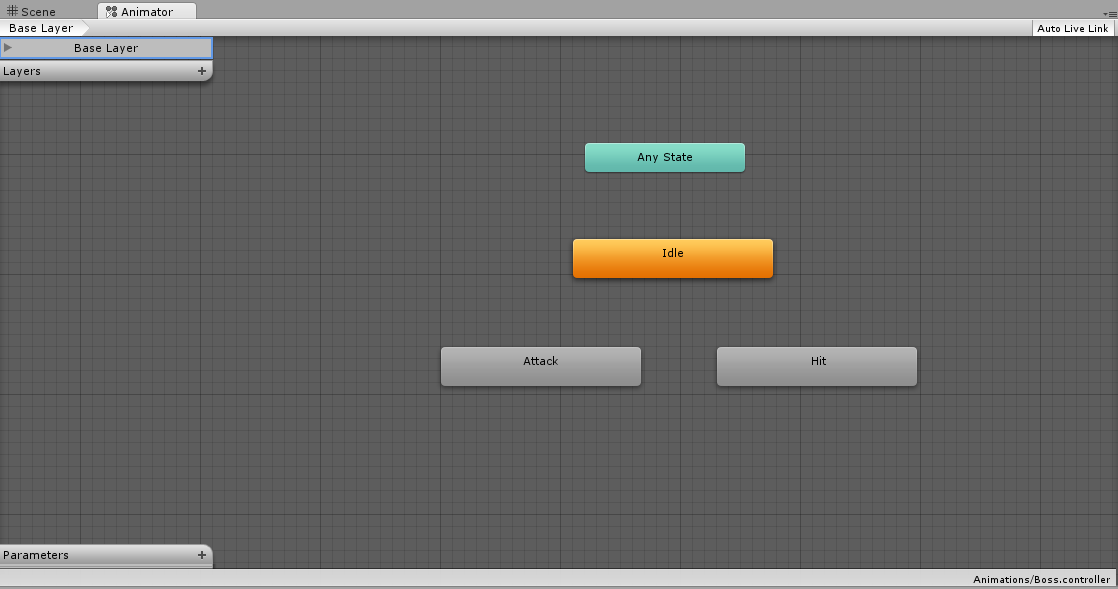
You can see that we have some states (the rectangles) created automatically with our clips, plus a special one called “Any State”.
Remember when you used the “Create New Clip” button of the “Animation” view ? Unity was in fact adding a state in the controller of the object, linked to the animation file you had created.
Click on each state of the animator and rename them to remove the “Boss_” prefix:
An “Animator Controller” is a state machine. Each state can be an animation, and you can define transitions between them.
A transition tells to Unity when and why it should move from a state to another.

In this image, we have created a link between two states. In order to animate the object with the “Hit” animation, we have to be in the “Idle” state first.
We will focus a bit more on transitions in a moment. For now, let’s look at the three different types of states.
1. Default state
The orange state is the default one: the initial state when the game is launched.
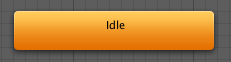
In this case, the “Idle” state is the default one (if it’s not, right click and “Set As Default”).
That means that when the game is started, the “Boss” object will automatically play the “Idle” animation (indefinitely if “Loop Time” is enabled in the animation “Inspector” — as it should be for this tutorial).
2. “Any State”
The green state, called “Any State”, is a special case.
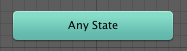
It’s a good way to simplify a state machine. It represents (as its name says so well) any state at a given time. In our “Boss” state machine, this state is, at the same time, the “Idle”, the “Hit” and the “Attack” states.
Let’s explain this with a few examples.
Imagine we have this state machine:

In order to “Jump”, you have to “Walk” first, then “Run” and FINALLY “Jump”. It means that the “Jump” animation won’t be played unless your object is in the “Run” state before. If you never “Run”, you will never “Jump”.
It’s not ideal, is it? We should be able to “Jump” when we “Walk” too!
Okay, let’s try this:
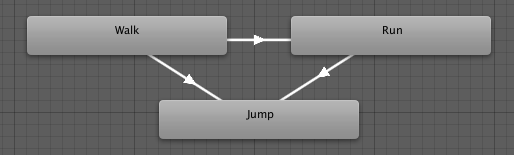
Great, we are now able to “Jump” from the “Walk” and “Run” states. However, if you add a few more states, you will need to create a lot of transitions to “Jump” from every state.
The solution is to use “Any State”:

With this state machine, any state can transition to a “Jump” state. Perfect, no?
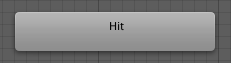
3. Normal state
The gray states are the normal ones, holding zero or one animation.
On the bottom left corner of the “Animator” view, you can find a parameters list. These parameters are used for the conditions of the transitions. More on that below.

(Contrary to the image above, it should be empty currently)
On the top left, you can see the layers. This is a way to have multiple state machines for one object. We will not use this feature in this tutorial.

And finally, the button “Auto live Link” on the top right is a cool Unity feature which allows you to see in real-time which state is currently played. Leave it enabled.
Adding parameters
A parameter is a value or a trigger for our state machine. Later, we will use these in the conditions of our transitions.
A parameter has 4 types available:
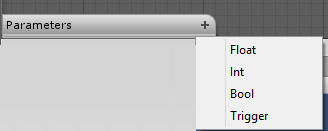
Int— simple integer number.Float— simple float number.Bool—trueorfalsevalue.Trigger— a flag which stays enabled until it is used. Then, it becomes unchecked.
Numbers are interesting for special use cases like an horizontal or vertical speed. You may want a different animation for walk or run, but they both rely on the movement speed of the player, which could be a parameter.
For our game, let’s add two new parameters:
- “Hit”, a trigger
- “Attack”, a boolean
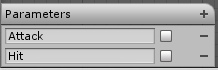
(Sadly, the editor doesn’t differentiate triggers from booleans visually)
Now, let’s see why we need them.
Transitions
A transition is a link between two states, telling to the state machine how we go from one to another.
1. “Idle to Attack”
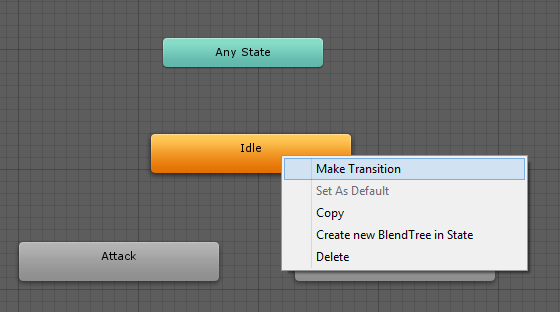
To create a transition, make a right click on the source state.
Let’s do it for “Idle to Attack” first:
- Right click on “Idle” state.
- Select “Make transition”:
- Now click on the destination state:
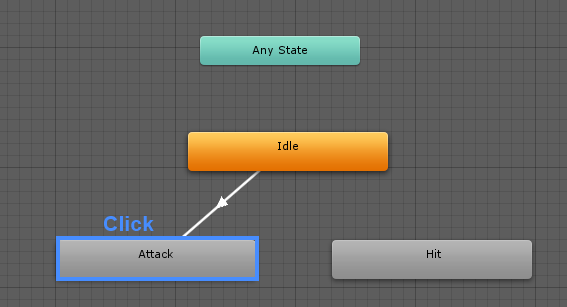
And that’s it!
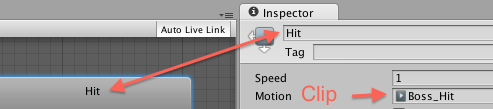
You can select the transition by clicking on the link. The “Inspector” will reveal a lot of interesting parameters, especially the entry conditions:
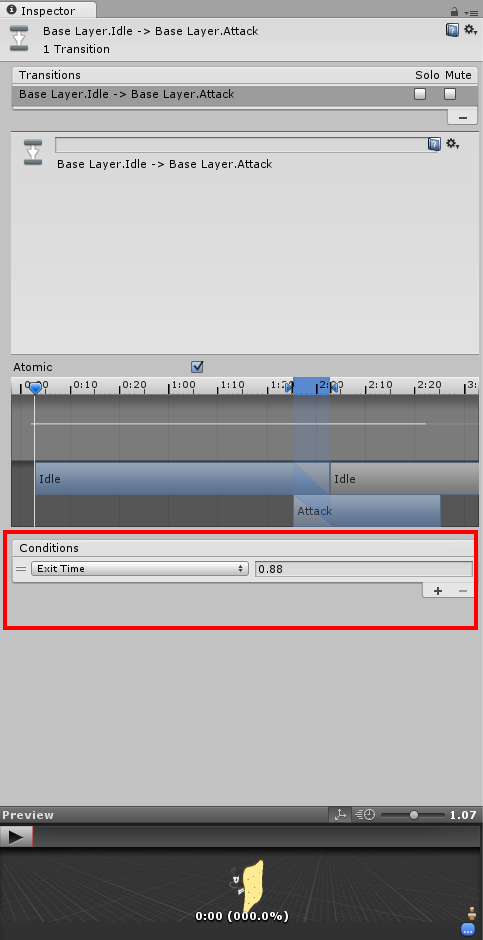
Exit Time: the “Exit Time” condition is the default condition for a transition. It means that the transition is valid (and can be executed) when the source animation is over.
This is what we will edit. Change “Exit Time” for the “Attack” parameter that we have defined earlier.

This condition means “If Attack is true then play “Attack” animation”.
The same way, add a transition between “Attack” and “Idle” with the condition “Attack is false”.
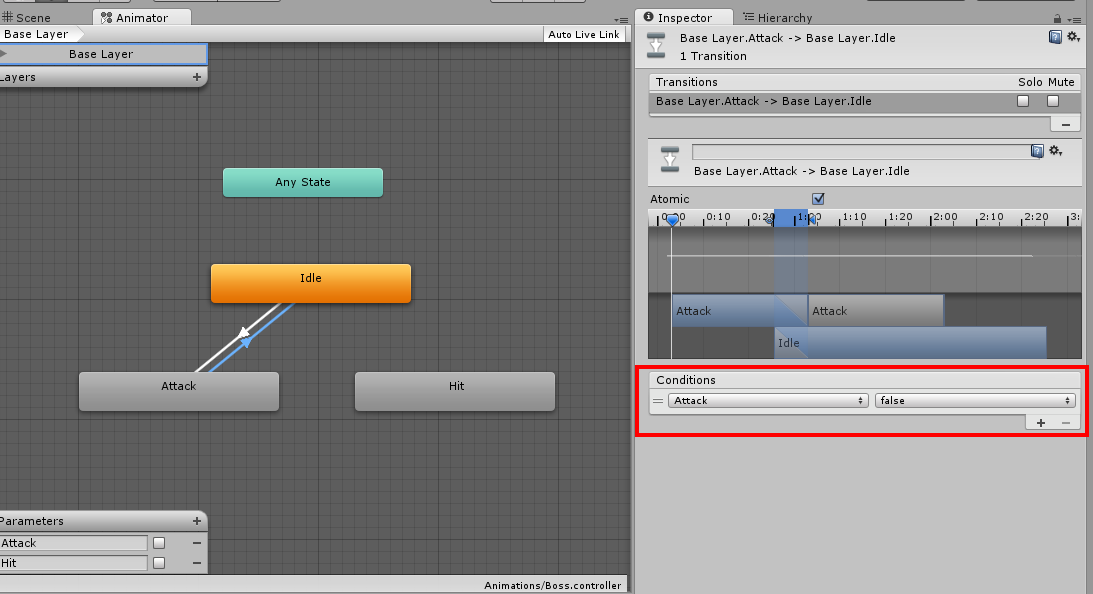
It means “If Attack is false then stop “Attack” animation and go back to Idle”.
You can observe that we had to define both transitions. Otherwise, the state machine would not have come back to the “Idle” state after an attack.
We will do nearly the same for the Idle animation.
2. “Idle to Hit”
Remember the “Any State” special state? We are going to use it now.
Make two new connections:
- “Any State” to “Hit”, condition
Hit. - “Hit” to “Idle”, condition
Exit Time.
If the trigger “Hit” is set, we play the animation “Hit” once and go back to “Idle”.
“Any State” is useful here because Hit can be triggered when the “Boss” is “Idle” or in an “Attack”. Instead of defining two relations, we just use “Any State”.
Trigger: as you can see, when you use a trigger, you don’t have to specify a value. Indeed, a trigger is just a way to tell to the state machine “If valid Then transition”.
Final graph
Our animator graph should now look like that:
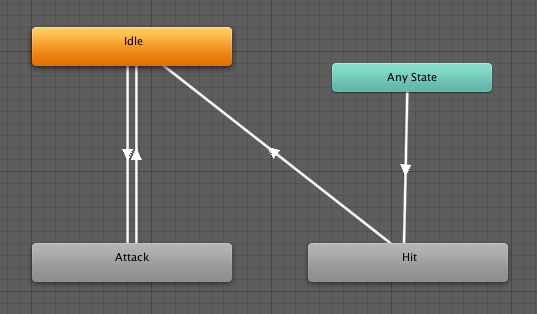
The last thing we need is some code to make it react in-game (the parameters are never triggered currently, so the animator will stay on “Idle”).
Animator graph: creating a graph in the animator is not an exact science. Depending on your code implementation, what you want to achieve or a precise sequence of actions, you may want to proceed differently. For example, in our case, we could also transition the “Attack” from the “Any State” state. But with only three short animations, it don’t make a difference to be honest.
When your graph will grow, you will have to make some choices that will impact your game.
Who’s the Boss?
Before we jump into the interesting stuff, we should have the boss ready to be inserted in the game.
We are going to be quick since this chapter is about animations.
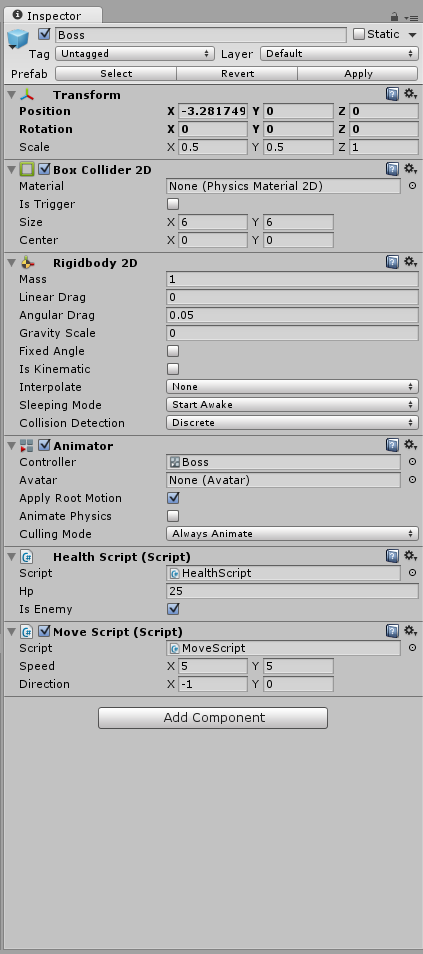
Preparing the prefab
Settings and Scripts
- Add a “HealthScript” to the big bad guy and grant him a lot of health points (like
50). - Add a “MoveScript”. For a good behavior, try a speed of
(5, 5).
Projectile
We need a new projectile when the boss try to hit the player.
Duplicate the “EnemyShot1” and change the image with this new one:
(Right click to save the image)
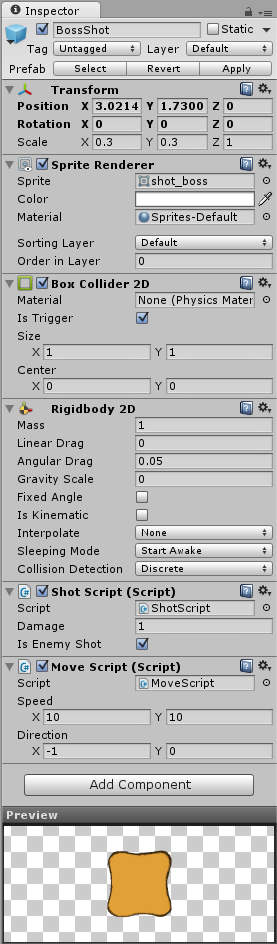
- Set the scale to
(0.3, 0.3, 1). - Save it as a new prefab.
You should get something like this:

Weapon
As we did for the “Poulpi”, add a weapon child to the boss (an empty game object with a “WeaponScript”).
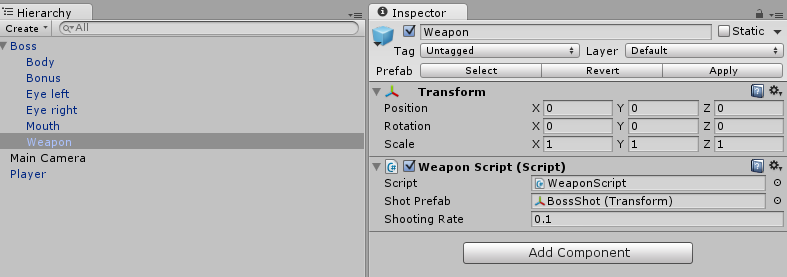
Okay! We are ready for the script and the animations!
New script
Here is the full script of the boss. Call it “BossScript”.
We’ll divide the explanations in two parts below: those related to the animations and those related to the boss.
using UnityEngine;

/// <summary>
/// Enemy generic behavior
/// </summary>
public class BossScript : MonoBehaviour
{
  private bool hasSpawn;

  //  Component references
  private MoveScript moveScript;
  private WeaponScript[] weapons;
  private Animator animator;
  private SpriteRenderer[] renderers;

  // Boss pattern (not really an AI)
  public float minAttackCooldown = 0.5f;
  public float maxAttackCooldown = 2f;

  private float aiCooldown;
  private bool isAttacking;
  private Vector2 positionTarget;

  void Awake()
  {
    // Retrieve the weapon only once
    weapons = GetComponentsInChildren<WeaponScript>();

    // Retrieve scripts to disable when not spawned
    moveScript = GetComponent<MoveScript>();

    // Get the animator
    animator = GetComponent<Animator>();

    // Get the renderers in children
    renderers = GetComponentsInChildren<SpriteRenderer>();
  }

  void Start()
  {
    hasSpawn = false;

    // Disable everything
    // -- Collider
    collider2D.enabled = false;
    // -- Moving
    moveScript.enabled = false;
    // -- Shooting
    foreach (WeaponScript weapon in weapons)
    {
      weapon.enabled = false;
    }

    // Default behavior
    isAttacking = false;
    aiCooldown = maxAttackCooldown;
  }

  void Update()
  {
    // Check if the enemy has spawned
    if (hasSpawn == false)
    {
      // We check only the first renderer for simplicity.
      // But we don't know if it's the body, and eye or the mouth...
      if (renderers[0].IsVisibleFrom(Camera.main))
      {
        Spawn();
      }
    }
    else
    {
      // AI
      //------------------------------------
      // Move or attack. permute. Repeat.
      aiCooldown -= Time.deltaTime;

      if (aiCooldown <= 0f)
      {
        isAttacking = !isAttacking;
        aiCooldown = Random.Range(minAttackCooldown, maxAttackCooldown);
        positionTarget = Vector2.zero;

        // Set or unset the attack animation
        animator.SetBool("Attack", isAttacking);
      }

      // Attack
      //----------
      if (isAttacking)
      {
        // Stop any movement
        moveScript.direction = Vector2.zero;

        foreach (WeaponScript weapon in weapons)
        {
          if (weapon != null && weapon.enabled && weapon.CanAttack)
          {
            weapon.Attack(true);
            SoundEffectsHelper.Instance.MakeEnemyShotSound();
          }
        }
      }
      // Move
      //----------
      else
      {
        // Define a target?
        if (positionTarget == Vector2.zero)
        {
          // Get a point on the screen, convert to world
          Vector2 randomPoint = new Vector2(Random.Range(0f, 1f), Random.Range(0f, 1f));

          positionTarget = Camera.main.ViewportToWorldPoint(randomPoint);
        }

        // Are we at the target? If so, find a new one
        if (collider2D.OverlapPoint(positionTarget))
        {
          // Reset, will be set at the next frame
          positionTarget = Vector2.zero;
        }

        // Go to the point
        Vector3 direction = ((Vector3)positionTarget - this.transform.position);

        // Remember to use the move script
        moveScript.direction = Vector3.Normalize(direction);
      }
    }
  }

  private void Spawn()
  {
    hasSpawn = true;

    // Enable everything
    // -- Collider
    collider2D.enabled = true;
    // -- Moving
    moveScript.enabled = true;
    // -- Shooting
    foreach (WeaponScript weapon in weapons)
    {
      weapon.enabled = true;
    }

    // Stop the main scrolling
    foreach (ScrollingScript scrolling in FindObjectsOfType<ScrollingScript>())
    {
      if (scrolling.isLinkedToCamera)
      {
        scrolling.speed = Vector2.zero;
      }
    }
  }

  void OnTriggerEnter2D(Collider2D otherCollider2D)
  {
    // Taking damage? Change animation
    ShotScript shot = otherCollider2D.gameObject.GetComponent<ShotScript>();
    if (shot != null)
    {
      if (shot.isEnemyShot == false)
      {
        // Stop attacks and start moving awya
        aiCooldown = Random.Range(minAttackCooldown, maxAttackCooldown);
        isAttacking = false;

        // Change animation
        animator.SetTrigger("Hit");
      }
    }
  }

  void OnDrawGizmos()
  {
    // A little tip: you can display debug information in your scene with Gizmos
    if (hasSpawn && isAttacking == false)
    {
      Gizmos.DrawSphere(positionTarget, 0.25f);
    }
  }
}
Don’t forget to assign the script to the “Boss” object!
Note: this script shares a lot of code with “EnemyScript”. Well, it’s because it’s a copy. We could have refactored “EnemyScript” and make “BossScript” inherits from it, but we wanted to stay simple and avoid to have to come back on a previous script here.
Remember: we’re here for the animations. ;)
1. Explanations: Animation
Let’s focus on a few points:
- We store a reference to the animator so we can use it later:
  private Animator animator;

  // ...

  void Awake()
  {
      // ...
      animator = GetComponent<Animator>();
      //...
  }
- We set the value of the boolean parameter “Attack” on the animator the first frame when we know that we are in an attack phase. Remember the controller and the transitions? Well, this will simply set a parameter value which will then trigger a transition to a new state:
  // Set or unset the attack animation
  animator.SetBool("Attack", isAttacking);
- We trigger the parameter “Hit” when a player’s shot hits the boss:
animator.SetTrigger("Hit");
Yes, you’ve read right: using an animator is that simple. :)
2. Explanations: Boss AI
Well, AI is… a little bit exaggerated here.
Our boss is in fact really stupid: it just moves, then shoots, then moves, then shoots… until it dies.
We have a boolean value to tell if it moves or shoots (isAttacking).
For the movement part, the boss randomly takes a visible point in the camera and starts to move there. When it reaches the point (when the point is in the collider bounds), it goes somewhere else. We made the point visible in debug mode:
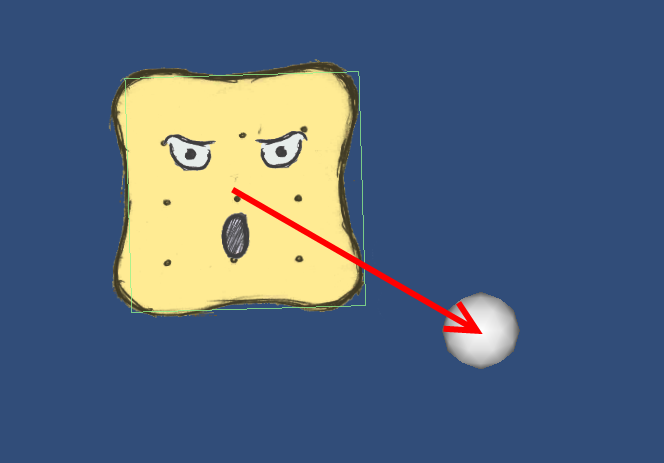
Tip: OnDrawGizmos is a very useful method to display debug informations in the scene from a script, by using the Gizmos class.
Here, we display the position where the boss is going as a sphere. You can see this sphere in the editor pane or in the “Game” view (if you enable “Gizmos”).
We alternate between these two phases with a simple timer (aiCooldown). When it reaches 0, we permute the phases and set a new random cooldown.
However, when the boss is hit, we force him to move (it stops any attack and finds a new position instead). This is why the transition to the “Hit” state is on “Any State” in the “Animator”.
Finally, when the boss spawns, it sets the camera and player scrolling to 0. That way, the game stops and tells you that you must defeat the enemy in order to continue (even if nothing comes after in the demo, you get the idea).
Result
It’s time to include this new enemy in the “Stage1” scene.
Put the boss after all your enemies:
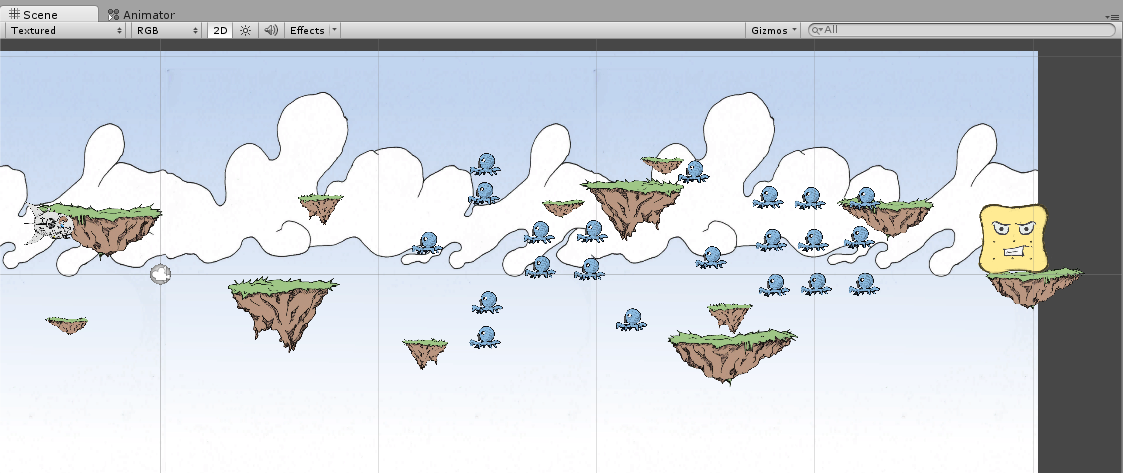
If you want to test it, you may have to add some health points to the player, otherwise it’s a bit… hardcore. :)
And now, you have a really nice-looking boss (with animations) to defeat!
(Click to see the animation)
If you select the game object in the “Hierarchy” and open the “Animator” window, you can see the “Animator Controller” in action:
Excellent!
Bonuses
Unfortunately, we have only scratched the surface of what you can do with the animator. Hopefully, the rest is fairly simple to understand.
Let’s see three other aspects.
Sub-State Machine
Imagine you have that:
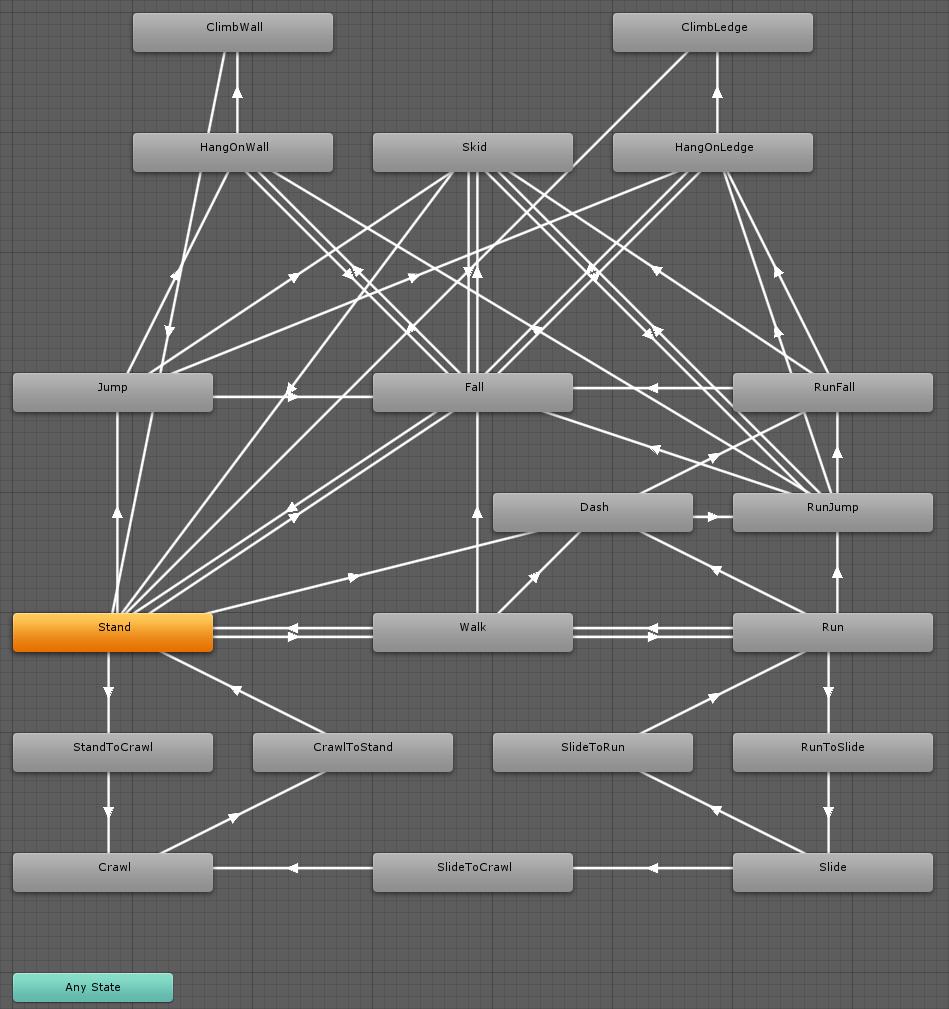
(Source: A very interesting topic on Unity Answers)
Well, it’s unmanageable.
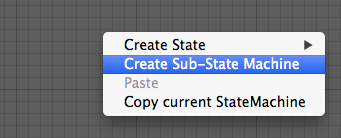
For these cases, Unity provides a “Sub-State Machine” feature. Right-click on your graph, and select “Create Sub-State Machine”.
Then, double-click on the new state:

Yup, that’s right: it creates a whole new graph inside the machine, with an “Any State” and an “(Up) Base Layer” state. It works exactly like the main graph, except that you can join a sub-state to a main state via the “(Up) Base Layer”.
Here is an example from one of our games:
And inside the “Jump” sub-state machine:

Blend tree
A blend tree is a special state that will merge some clips based on a parameter.
For example, you can have a “Walk”, “Run” and “Sprint” clips. With a blend tree and a speed parameter, the animator will know how to merge these three clips together depending on the speed.
Miscellaneous
Selecting a precise transition, solo and mute
If you have multiple transitions on a state, you can select the state and click on its transitions list directly to select one of them:

Look at the “Mute” and “Solo” checkboxes.
Their purposes are to isolate a transition from the rest.
- If you click on “Mute”, this transition is ignored by the animator.
- If you click on “Solo”, only this transition can be played by the animator.
It’s really useful when you want to test a specific state or a precise flow.
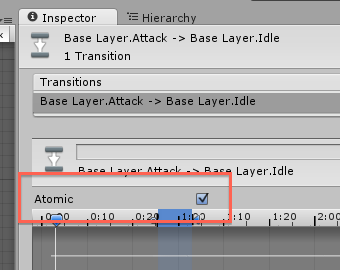
Atomic
By default, a transition is “Atomic”. It means that a transition cannot be interrupted.
You can disable this behavior by unchecking this parameter:
End of this bonus chapter
Here we are: we know how to create animation clips and use them in an animator!
This bonus chapter about animations is over!
If you liked this advanced tutorial, you might want to:
